
Tools
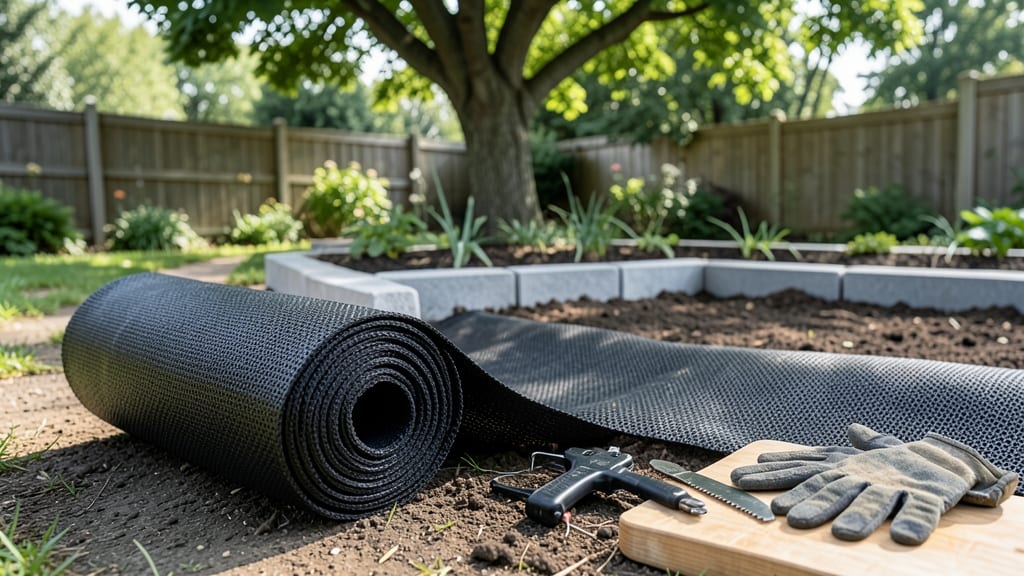
My garden weed fabric transformed my yard from a battleground to a peaceful retreat—no more pulling weeds by the bucketful. 🌱 This heavy-duty barrier blocks weeds at the root while improving soil moisture and temperature, making it the secret weapon for low-maintenance gardens.
The key is choosing the right thickness (3-4 oz) and installing it properly to avoid common pitfalls like overheating or drainage issues.
You'll need a roll of landscape fabric, a sharp utility knife, landscape staples, and a layer of mulch or soil on top. The fabric should cover the entire planting area, extending at least 6 inches beyond the edges to prevent weeds from creeping in.
Overlap seams by 6-12 inches and secure them tightly to avoid gaps where weeds can sneak through.
Once installed, you'll notice fewer weeds almost immediately, and your plants will thrive with better moisture retention. The fabric also helps regulate soil temperature, protecting shallow roots during heatwaves. Just remember to leave space for plant roots to grow through—use slits or cutouts where you'll plant.
For long-term success, check the fabric annually for tears and replace it if it degrades. If weeds still pop up, add a thicker layer of mulch or consider a dual-layer system for high-weed-pressure areas. With proper care, this fabric can last 5-10 years, saving you countless hours of weeding.
📚 In This Guide
- What you need
- Instructions
- Tips and common mistakes
- Wrapping up and next steps
What you need
- ● Garden weed fabric – Choose a landscape fabric rated for 30–60 lb test weight (thicker = better weed suppression). Measure your garden area and buy 10–20% extra for overlaps and edges.
- ● Stakes or landscape pins – 6–12-inch galvanized metal stakes (1 stake per 3–4 sq ft of fabric) or U-shaped landscape pins to secure the fabric firmly.
- ● Shovel or spade – For digging trenches 6–12 inches deep around garden edges or under existing mulch.
- ● Garden shears or utility knife – To cut fabric cleanly to size (avoid fraying!).
- ○ Mulch (optional but recommended) – 2–4 inches of organic mulch (wood chips, straw, or pine needles) to cover the fabric and deter weeds while retaining moisture.
- ● Garden hose with spray nozzle – To wet the fabric before laying it down (helps it settle and prevents shifting).
- ● 🌡️ Choose the right fabric: Look for UV-stabilized, breathable weed fabric (avoid plastic sheets—they don’t allow water/air through!).
- ● ✨ Prep your soil: Remove existing weeds and debris before laying the fabric to prevent regrowth.
- ● 🎯 Secure edges well: Bury fabric edges 2–3 inches deep or use heavy rocks/mulch to weigh them down.
How to install garden weed fabric for long-term weed suppression
Weed fabric isn’t just a temporary fix—it’s a game-changer for low-maintenance gardens. Here’s how to lay it down right the first time.
🌱 Step 1: Clear the Area Thoroughly
Start by removing every weed, grass clump, and rock from the space. Even small roots left behind will push through the fabric later. I like to use a garden fork to loosen stubborn weeds, then pull them out by hand. This is the most critical step—skipping it means future weeds will pop up like bad weeds at a party.
Rake the soil smooth and level the ground. Uneven spots will create gaps where weeds can sneak through. Press down any high spots with your feet or a board. The goal is a clean, flat canvas ready for the fabric.
✂️ Step 2: Cut Weed Fabric to Fit Your Space
Measure your garden bed and cut the weed fabric 2-3 feet wider than the planting area on all sides. This extra fabric will fold under plants and create a clean edge. I use sharp scissors or a utility knife for clean cuts—ragged edges let weeds slip through over time.
For curved beds, cut the fabric in overlapping sections rather than one big piece. This makes installation easier and reduces waste. If you’re covering a large area, lay out the fabric first to visualize how it fits before cutting.
🪴 Step 3: Lay Down the Fabric Smoothly
Spread the weed fabric over the cleared soil, smoothing out wrinkles as you go. Overlapping seams by 6-12 inches ensures no gaps form. Press the edges firmly into the soil to prevent wind from lifting it. If you’re covering a slope, anchor the fabric with landscape staples every 12-18 inches along the edges.
For permanent beds, fold the excess fabric 6 inches inward along the perimeter. This creates a clean border that won’t fray over time. If you’re planting directly into the fabric, make small X-shaped cuts where plants will go—never pull back fabric, as this creates holes.
☀️ Step 4: Secure Edges and Add Mulch
Use landscape staples or galvanized nails to pin down the fabric edges along pathways or garden borders. Drive them at a 45-degree angle into the soil to hold firmly. For decorative edges, bury the fabric under 2-3 inches of mulch or pavers to keep it tidy and weed-free.
Top the fabric with 2-4 inches of organic mulch (like wood chips or straw) to block light completely. This is what actually stops weeds—without mulch, sunlight will penetrate and spur weed growth. Water lightly after mulching to settle everything in place.
🌿 Step 5: Plant Through Pre-Cut Slits
Mark planting spots with sticks or string, then cut X-shaped slits in the fabric where each plant will go. The X shape prevents the fabric from tearing when you push plants through. For large plants, make the slit 4-6 inches wide to accommodate root balls.
Plant as usual, then gently pull the fabric flaps back over the roots and secure with a few landscape staples or rocks. This keeps weeds from creeping up around your plants. Water deeply after planting to help roots establish before the fabric blocks moisture.
Tips & tricks for perfect weed fabric installation
Took me a while to figure these out, so here's how to avoid the common pitfalls I faced when installing weed fabric for the first time.
Prep is Everything: I learned this the hard way after ruining three installations—always clear the area down to bare soil. Even tiny roots or pebbles will create gaps where weeds will eventually push through. Use a garden fork to dig out stubborn weeds completely, especially along the edges. The extra effort in Step 1 saves you from constant weeding later.
Cut with Precision: When measuring for that 2-3 feet wider cut in Step 2, don't eyeball it—use a tape measure. I once cut fabric too close to the planting area and spent hours pulling weeds that grew through the tight edges. For curved beds, cut in overlapping sections rather than one giant piece; it's easier to handle and reduces waste. Sharp scissors or a utility knife makes all the difference—dull tools create ragged edges that let weeds sneak through.
Mulch Matters More Than You Think: That 2-4 inches of organic mulch in Step 4 isn't optional—it's what actually blocks sunlight and prevents weed seeds from germinating. I skipped proper mulching once and ended up with a garden bed that looked like a weed jungle within weeks. Use wood chips or straw for best results, and water lightly after applying to help settle everything in place. The mulch layer should be thick enough that you can't see the fabric through it.
Planting Through Fabric: Those X-shaped slits in Step 5 are non-negotiable for large plants. I tried pulling back fabric for big shrubs and ended up with holes that became weed entry points. For small plants, keep the slits tight—just big enough for roots. And here's a pro move: after planting, gently tuck the fabric flaps back over the roots and secure with a few landscape staples. This keeps weeds from creeping up around your plants while still allowing roots to grow through.
Pro Tips for Garden Weed Fabric
- Took me a while to figure these out, so here's how to avoid the common pitfalls I faced when installing weed fabric f...
- Prep is Everything: I learned this the hard way after ruining three installations—always clear the area down to bare ...
- Cut with Precision: When measuring for that 2-3 feet wider cut in Step 2, don't eyeball it—use a tape measure. I once...
Frequently asked questions
Got questions about garden weed fabric?
Here are answers to the most common ones to help you use this root-blocking barrier like a pro!
What’s the best time of year to install garden weed fabric?
Install weed fabric in early spring (before weeds sprout) or late fall (after weeds die back). Avoid summer—hot soil can damage the material. For new beds, lay it down after tilling but before planting. If adding to an existing garden, clear weeds first!
How long does garden weed fabric last?
High-quality weed fabric lasts 5–10 years (or longer in dry climates). UV-stabilized fabrics resist degradation. Check for tears annually and repair with landscape staples or fabric tape. If it degrades, replace it—old fabric lets weeds through!
Can I use garden weed fabric under mulch?
Yes! Weed fabric works best under mulch (like wood chips or straw). The fabric blocks weeds while mulch conserves moisture and regulates soil temperature. Just ensure the fabric has 1–2 inches of soil underneath for drainage—mulch alone won’t prevent weeds long-term.
Is garden weed fabric worth the cost compared to other weed barriers?
While plastic sheeting is cheaper ($0.50–$2/sq ft), it traps heat and blocks water. Weed fabric ($0.75–$3/sq ft) is breathable, lasts longer, and won’t smother plants. For heavy weed pressure, it’s the smartest investment—saves time and backaches!
Why are weeds still growing through my weed fabric?
Weeds poke through if the fabric is punctured, old, or improperly installed. Check for:
- Gaps at edges or seams—lap seams by 6+ inches.
- Thickness—use 3–4 oz fabric for most gardens.
- Depth—bury edges 6+ inches deep or weigh them down with rocks.
Wrapping up and next steps
Garden weed fabric is your secret weapon for a low-maintenance, lush garden—no more backbreaking weeding! By blocking weeds at the root while allowing water and nutrients to reach your plants, it saves time, effort, and frustration.
Whether you're a seasoned gardener or just starting, this simple solution delivers permanent results with minimal upkeep.
Ready to transform your garden? Start small—lay a test strip in one bed, observe the difference, and expand as you go! 🌱 With the right fabric and a little patience, your dream garden is just a few steps away.