
Pests
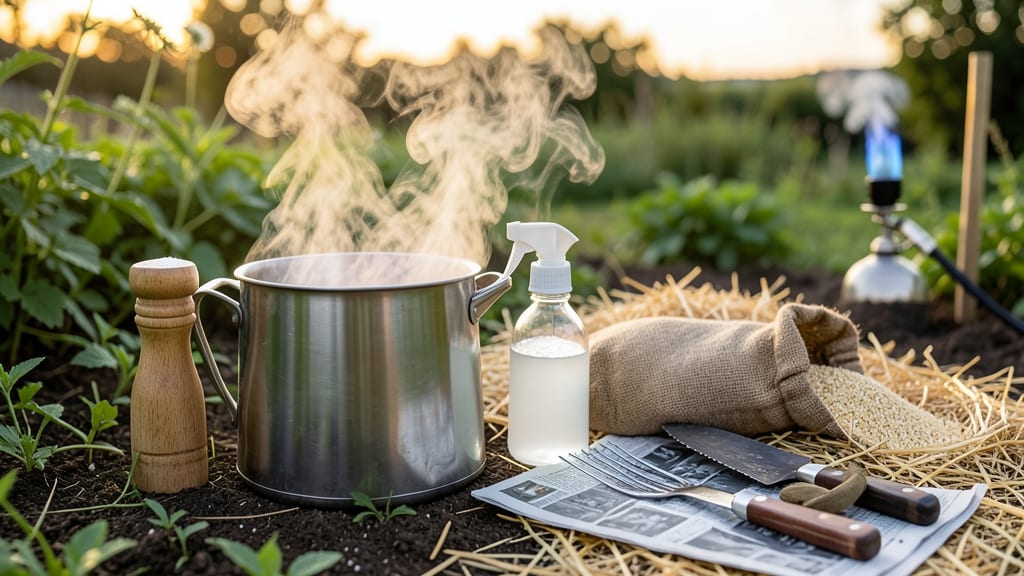
Getting rid of weeds without chemicals starts with the right timing and tools. ✨ I’ve battled stubborn crabgrass and dandelions for years, and these natural methods actually work faster than I expected—no harsh sprays required.
The secret lies in consistency: pull weeds when soil is moist, use sharp tools for clean cuts, and apply mulch to smother new growth. Boiling water or vinegar spot-treat tough patches, while a sturdy hoe keeps them from returning. Even stubborn lawn weeds weaken within a week of targeted effort.
What you’ll end up with is a garden where weeds stay manageable, not a never-ending war. The soil stays healthy, kids and pets stay safe, and you avoid the guilt of chemical runoff. Best of all, it’s a system that scales from small beds to entire lawns.
Works for any garden type—just adjust the tools and timing. Ready to reclaim your space without the mess?
📚 In This Guide
- What you need
- Instructions
- Tips and common mistakes
- Wrapping up and next steps
What you need
- ● Garden gloves (1 pair) – Protect your hands from prickly weeds and sharp tools. Opt for nitrile-coated gloves for extra durability.
- ● Hand weeder or dandelion digger (1) – A sturdy, long-handled tool (like the Fiskars X27 Ergo) makes pulling weeds easier. Look for a serrated edge for slicing roots.
- ● Hoe or stirrup hoe (1) – A stainless steel hoe (e.g., Radiah Garden Hoe) works best for chopping weeds at the soil line. Choose one with a comfortable grip for long sessions.
- ● Sharp scissors or pruners (1 pair) – For cutting stubborn weeds like bindweed or crabgrass. Disinfect blades with rubbing alcohol between uses.
- ● Boiling water (5–10 gallons) – Use a large pot, kettle, or watering can to pour directly on weeds. Caution: Avoid plants you want to keep!
- ● White vinegar (1 gallon) – A 5–20% acetic acid solution (higher concentrations work faster). Note: Undiluted vinegar can harm nearby plants.
- ● Salt (1–2 lbs) – Non-iodized salt (like Morton Kosher Salt) works best. Avoid using it near edible plants or lawns.
- ● Corn gluten meal (5–10 lbs) – A natural pre-emergent herbicide that prevents weed seeds from sprouting. Apply 1 lb per 100 sq ft in early spring.
- ● Baking soda (1 box) – Mix with water (1:1 ratio) for a gentle weed killer on sidewalks or driveways.
- ● Newspaper or cardboard (2–3 sheets) – For smothering weeds in garden beds. Use uncoated, black-and-white paper only.
- ● Mulch (straw, wood chips, or leaves) – Apply a 3–4 inch layer to suppress weeds and retain moisture.
- ● Solar-powered weed burner (e.g., Weed Dragon) – For large areas; uses propane to torch weeds (great for driveways).
- ● Spray bottle (1–2) – For targeted vinegar or soapy water applications. Choose a 16–32 oz size with a fine-mist nozzle.
- ● Dish soap (1 bottle) – Add 1 tbsp per gallon of water to vinegar for a sticky, weed-killing solution.
- ● Landscape fabric – If smothering weeds long-term, use perforated fabric to allow water through.
- ● Kneeling pad – For comfort during long weeding sessions (especially on hard surfaces).
Step-by-Step instructions for natural weed removal
Here’s the method I’ve used for years to clear stubborn weeds without harsh chemicals—fast and effective.
🌱 Step 1: Identify and Target the Worst Weeds First
Start by scanning your yard or garden and focus on the most aggressive weeds—those with deep roots or spreading runners. I like to pull these first because they’ll take the most effort. Look for weeds with broad leaves (like dandelions) or creeping stems (like crabgrass)—these spread quickly and compete fiercely with your plants.
Grab a pair of gardening gloves to protect your hands, especially if the weeds have thorns or sap. You’ll notice some weeds pull out easily while others resist—those are the ones to tackle first. Avoid pulling weeds when the soil is dry; it’s easier to remove them when the ground is slightly moist, usually right after watering or a light rain.
💧 Step 2: Smother and Suffocate Weeds with Mulch or Newspaper
For areas where weeds keep returning, smothering is the fastest solution. Lay down 2-3 layers of damp newspaper (black ink only) or 3-4 inches of organic mulch like straw or wood chips over the weed-infested soil. This blocks sunlight, which weeds need to grow. I’ve seen stubborn patches disappear completely in just 2-3 weeks this way.
Press the mulch or newspaper firmly into place to eliminate air pockets. If you’re using newspaper, weigh it down with rocks or boards until the weeds die. For mulch, apply it evenly—thicker areas will work faster. Check weekly for any weeds poking through and smother them immediately. This method is especially effective for driveways, sidewalks, or garden beds where weeds keep popping up.
☀️ Step 3: Boil Water or Use Vinegar for Spot Treatment
For isolated weeds, boiling water is a quick and effective way to kill them on contact. Heat 2-3 quarts of water until it’s steaming, then pour it directly over the weed’s base. The heat destroys the plant’s cells instantly. I like to do this on a sunny day when the weeds are actively growing—they’ll wilt within minutes.
If you prefer a vinegar solution, mix 1 gallon of white vinegar with 1 cup of salt and 1 tablespoon of dish soap. Spray this directly on the weeds (avoid desirable plants—it’s non-selective). The vinegar dries out the weed, and the soap helps it cling to the leaves. You’ll see results in 1-3 days, but reapply if the weed persists. Always test a small area first to ensure it doesn’t damage nearby plants.
✂️ Step 4: Hand-Pull or Use a Weeding Tool for Deep Roots
For weeds with deep taproots (like dandelions), a weeding tool or fork makes the job easier. Insert the tool 1-2 inches into the soil beside the weed and wiggle it back and forth to loosen the roots. Pull firmly upward—you’ll feel resistance at first, but once the roots break free, the weed should come out cleanly. I’ve found that pulling weeds in the early morning or late afternoon (when the soil is cooler) reduces the chance of regrowth.
If the weed breaks off at the surface, it’ll regrow. To prevent this, dig deeper or use a tool to ensure the entire root comes out. For large patches, a hoe can help slice through weeds at the soil line before they seed. Work in small sections—weeding is less overwhelming when you tackle it bit by bit. After pulling, dispose of weeds in the trash (not compost) to prevent them from spreading.
Tips & tricks for natural weed removal
Here’s what nobody tells you about making natural weed removal work even faster and more effectively.
Timing is Everything: The best time to tackle weeds is after a light rain or watering when the soil is moist but not soggy. I’ve found that weeds pull out cleanly with minimal effort when the ground is damp—this is especially true in Step 1 when you’re targeting aggressive weeds. Early morning or late afternoon is ideal because the soil stays cooler, reducing regrowth chances. Pro tip: If you’re working in dry conditions, give the area a quick watering 30 minutes before you start.
The Smothering Secret: When using the smothering method in Step 2, focus on eliminating air pockets completely. I’ve seen stubborn weeds survive because tiny gaps let sunlight through. For newspaper, weigh it down with heavy rocks or boards—this creates a complete seal. For mulch, press it firmly into place, especially around the edges. If you notice any weeds poking through after a week, smother them immediately with an extra layer. This method works best in sunny areas where weeds can’t get any light at all.
Spot Treatment Precision: For the boiling water method in Step 3, aim for the base of the weed—not just the leaves. The heat needs to reach the roots to kill the plant completely. I’ve made the mistake of pouring boiling water on the leaves only, and the weed would just regrow. For the vinegar solution, always test a small area first, especially if you’re treating near desirable plants. The mix is non-selective, so it will kill anything it touches. Apply on a calm day so the spray doesn’t drift onto plants you want to keep.
Tool Technique: In Step 4, when using a weeding tool or fork, insert it just beside the weed’s stem—not directly into it. This prevents damaging your plants while loosening the roots. I’ve found that wiggling the tool back and forth for a few seconds before pulling makes all the difference. For dandelions, you might need to go deeper than 2 inches—don’t be afraid to dig until you feel the root give way completely. If you’re working in hard soil, a little water can help loosen it up before you start pulling.
Pro Tips for Get Rid Of Weeds Without Chemicals
- Here’s what nobody tells you about making natural weed removal work even faster and more effectively.
- Timing is Everything: The best time to tackle weeds is after a light rain or watering when the soil is moist but not ...
- The Smothering Secret: When using the smothering method in Step 2, focus on eliminating air pockets completely. I’ve ...
Frequently asked questions
Got questions about ditching chemicals and keeping your garden weed-free? Here are some of the most common ones—and their answers!
What’s the fastest way to kill weeds naturally?
For immediate results, try boiling water or a vinegar-based spray (1 gallon vinegar + 1 tbsp dish soap). These methods work within 24–48 hours for young weeds. For stubborn ones, repeat weekly. Boiling water is best for cracks in driveways, while vinegar works on garden beds (but avoid desirable plants!).
How often should I pull weeds to prevent regrowth?
Consistency is key! Aim to pull weeds weekly during peak growing seasons (spring and summer). Focus on young weeds—they’re easier to remove and less likely to spread seeds. Use a weed puller or hand trowel to get the roots. Mulching after pulling helps suppress new growth.
Will corn gluten meal really stop weeds from growing?
Yes! Corn gluten meal is a pre-emergent herbicide that blocks weed seeds from sprouting. Apply it in early spring (before weeds appear) and again in fall for best results. It’s safe for established plants and breaks down naturally. Just keep it 2–3 inches away from seeds you want to grow.
Can I use household items like salt or baking soda to kill weeds?
While salt and baking soda can kill weeds, they’re not ideal for most gardens. Salt harms soil fertility long-term, and baking soda lacks the acidity needed to be effective. Stick to vinegar, boiling water, or manual removal for safe, chemical-free solutions. Save salt for targeted spot treatments like sidewalks.
Do I need to remove weeds in winter?
Winter is a great time to reduce weed pressure! Pull any visible weeds or cover bare soil with mulch or cardboard to block light. Dormant weeds can still re-sprout in spring, so stay proactive. If your area has freeze-thaw cycles, weeds may push through—check monthly. Early spring is the best time to tackle them before they spread.
Will natural weed killers harm my pets or bees?
Most natural methods (vinegar, boiling water, corn gluten) are pet-safe once dry, but vinegar can irritate paws if ingested. Avoid citrus oil or clove oil sprays—they’re toxic to pets. For bees, skip essential oil sprays and opt for mechanical removal or mulching. Always test small areas first!
Wrapping up and next steps
Say goodbye to weeds without harming your garden or the planet! 🌱 From boiling water and vinegar to mulching and hand-pulling, you now have natural, effective methods to reclaim your space. Remember, consistency is key—regular maintenance keeps weeds at bay for good.
Ready to transform your garden? Start with one method today and watch your efforts pay off. Happy gardening! 🌿