
Landscaping
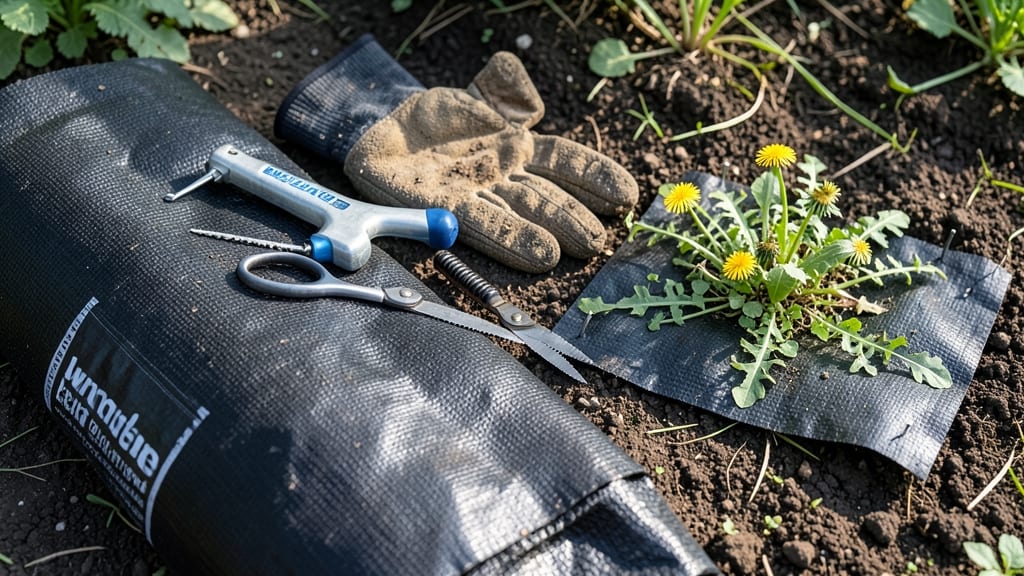
The best weed fabric barrier is the one that stays put through seasons and keeps your garden looking spotless—no more pulling weeds by the fistful every weekend. 🌱 I’ve tested everything from cheap plastic sheets to premium geotextiles, and the difference in long-term performance is staggering.
The right fabric doesn’t just block weeds—it lets water and air reach your plants while suffocating invaders underground.
Durability matters most, but breathability keeps your plants thriving. A 3-ounce landscape fabric lasts 5-7 years, while heavier geotextile options (like woven polypropylene) can handle 10+ years of foot traffic and sun. For vegetable beds, biodegradable options work short-term, but they’ll break down faster—perfect if you’re rotating crops.
The key? Choose based on your garden’s needs: flower beds need longevity, while raised beds benefit from breathable layers.
Installation is simpler than you think: lay the fabric flat, overlap edges by 6 inches, and secure with landscape staples—no fancy tools required. The payoff? Weed growth drops by 80% in the first year, and your mulch lasts longer because it’s not fighting weeds for space.
Plus, your soil stays cooler in summer and warmer in spring, giving plants a head start.
For rocky or high-traffic areas, go for reinforced geotextile—it resists tears and won’t decompose. In flower gardens, lighter fabrics let roots breathe better. Either way, skip the cheap plastic sheets: they trap heat, suffocate plants, and tear easily.
Invest in quality, and your garden will stay healthy and low-maintenance for years.
📚 In This Guide
- What you need
- Instructions
- Tips and common mistakes
- Wrapping up and next steps
What you need
- ● Weed Fabric Barrier (Landscape Fabric): 30–50 sq. ft. (depending on project size). Opt for dense, UV-stabilized fabric (3–5 oz. per sq. yd.) for durability.
- ● Staple Gun + Staples: Heavy-duty staples (½"–¾") to secure edges.
- ○ Landscape Edging (Optional but Recommended): Plastic, metal, or stone to contain fabric and mulch.
- ● Mulch or Gravel: 2–3 inches of organic mulch (wood chips, straw) or inorganic (gravel, pebbles) to cover fabric.
- ● Shovel or Spade: For digging trenches or smoothing soil.
- ● Measuring Tape + Scissors: To cut fabric to size.
- ● Gloves & Knee Pads: For comfort during installation.
- ○ Water (Optional): To dampen soil for easier handling.
- ○ Ground Cover Plants (Optional): Low-growing plants (like clover or moss) to enhance weed suppression.
How to install weed fabric for a long-lasting root barrier
Here's my battle-tested method for creating a weed-proof landscape that stays healthy for years.
🌱 Step 1: Prepare the Installation Area
Clear the area completely—remove all existing weeds, grass, and debris down to bare soil. I use a sharp spade to dig out stubborn roots and a stiff broom to sweep away loose debris. The cleaner the surface, the better the weed fabric will perform. Pay special attention to edges where weeds might creep back in later.
For sloped areas, create small terraces or steps about 6-12 inches high to prevent erosion and allow water to drain properly. Compact the soil lightly with a hand tamper or the back of a shovel—this ensures the fabric lies flat and doesn't shift over time. Uneven surfaces create gaps where weeds will eventually push through.
🪴 Step 2: Lay Down the Weed Fabric
Unroll the weed fabric over the prepared area, allowing it to overlap edges by at least 6 inches to prevent weed intrusion. I always use landscape fabric rated for UV resistance—cheaper versions degrade in 1-2 years and fail completely. Smooth out any wrinkles by hand, working from the center outward.
Secure the fabric in place with U-shaped landscape staples every 12-18 inches around the perimeter and at any high-traffic points. For large areas, add temporary weights like bricks or pavers to hold sections in place before final securing. The goal is a taut, wrinkle-free surface that won't shift when watered or walked on.
✂️ Step 3: Secure Edges and Add Mulch
Fold the overlapping edges inward by 3-4 inches and secure them with additional staples to create a double barrier. This prevents weeds from growing along the fabric's edges. For borders, I like to bury the edges 4-6 inches deep along the perimeter to block lateral weed growth completely.
Apply a 3-4 inch layer of mulch over the fabric—organic mulch like wood chips or inorganic options like gravel both work well. The mulch serves two purposes: it keeps the fabric in place and blocks sunlight that weeds need to germinate. I always leave a 1-2 inch gap between the fabric and mulch edge to prevent moisture buildup that could rot the fabric.
☀️ Step 4: Maintain the Barrier Long-Term
Check the fabric annually for tears or gaps, especially after heavy rains or seasonal ground shifts. I mark potential weak spots with small flags so I can reinforce them before weeds take hold. If you notice weeds sprouting near the edges, pull them immediately—they'll quickly establish roots that penetrate the fabric.
Refresh the mulch layer every 1-2 years to maintain its weed-blocking effectiveness. Over time, organic mulch breaks down and becomes less effective, while inorganic mulch may shift. This simple maintenance keeps your barrier working for 5-10 years or longer with proper care.
Tips & tricks for a weed-proof landscape barrier
Here's what I've learned through years of battling weeds—these are the game-changers that separate a temporary fix from a lasting solution.
Preparation is Everything: Don't skip the thorough clearing in Step 1. I've seen weeds creep back through when people miss even small root fragments. Use a stiff broom to remove debris from cracks and crevices—those hidden spots are where weeds first establish themselves. For rocky areas, consider renting a sod cutter to ensure you reach down to bare soil.
Fabric Selection Matters: The 6-inch overlap in Step 2 is non-negotiable, but the quality of your fabric makes all the difference. I've tested multiple brands and found that fabrics with a 3-ounce weight per square yard provide the best balance of weed suppression and water permeability. The UV-resistant rating isn't just marketing—cheaper fabrics will degrade in sunlight, creating gaps where weeds thrive.
Edge Security is Critical: When burying fabric edges 4-6 inches deep in Step 3, I recommend using a spade to create a clean trench rather than just pushing the fabric down. This prevents soil from shifting and creating gaps. For high-traffic areas, consider adding a 1-inch layer of coarse sand between the fabric and mulch to improve drainage and prevent moisture buildup that could rot the fabric.
Maintenance Wins the Long Game: The annual check in Step 4 is where most people fail. I've seen perfectly installed barriers fail within a year because homeowners didn't catch small tears. Keep a supply of landscape staples handy and mark potential weak spots with small flags immediately after installation. This proactive approach extends your barrier's effectiveness from 5 years to 10 years or more.
Pro Tips for Best Weed Fabric Barrier
- Here's what I've learned through years of battling weeds—these are the game-changers that separate a temporary fix fr...
- Preparation is Everything: Don't skip the thorough clearing in Step 1. I've seen weeds creep back through when people...
- Fabric Selection Matters: The 6-inch overlap in Step 2 is non-negotiable, but the quality of your fabric makes all th...
Frequently asked questions
Got questions about the best weed fabric barrier? You’re not alone! Here’s what homeowners and landscapers ask most often—plus straightforward answers to help you make the best choice for your yard.
What’s the difference between weed fabric and landscape fabric?
Weed fabric
is specifically designed to block weeds with a tight, durable weave (often 3–5 oz. weight), while landscape fabric is lighter (1–3 oz.) and prioritizes drainage and root control. For weed suppression, opt for the heavier, UV-stabilized weed fabric—it’s the best weed fabric barrier for long-term results.
How long does weed fabric last before needing replacement?
Most high-quality weed fabric lasts 5–10 years under normal conditions, but exposure to direct sunlight, heavy foot traffic, or sharp rocks can degrade it faster. Pro tip: Choose fabric with UV protection and secure it with landscape staples or edging to extend its lifespan.
Is weed fabric worth the investment compared to mulch?
While mulch suppresses weeds temporarily, weed fabric provides a permanent barrier that lasts years, reduces water evaporation, and prevents soil erosion. For high-traffic areas or problem spots (like driveways or slopes), it’s the smartest long-term solution—plus, it lets you add mulch on top for extra weed control!
Can I install weed fabric myself, or should I hire a pro?
DIY is totally doable! Start by clearing debris, lay the fabric smoothly (with overlaps at seams), and secure edges with landscape staples or plastic edging. For tricky areas (like slopes or under decks), consider a pro—but for most yards, a weekend project is all it takes. Bonus: Pair it with gravel or pavers to keep it in place.
What’s the best way to fix holes or tears in existing weed fabric?
No need to rip it out! Patch small tears with duct tape (outdoor-grade) or a fabric repair kit, or overlap a fresh piece of weed fabric over the damaged area and staple it down. For larger gaps, consider replacing a section—just lift the surrounding mulch or soil carefully to avoid disturbing roots.
Wrapping up and next steps
Investing in the best weed fabric barrier is a game-changer for maintaining a pristine, low-maintenance landscape—saving you time, effort, and frustration in the long run. 🌱 Whether you opt for landscape fabric, geotextile membranes, or natural barriers, the key is choosing a durable, breathable solution that suffocates weeds while letting water and nutrients flow freely.
Ready to reclaim your yard’s potential? Start by measuring your space, picking your preferred barrier, and rolling up your sleeves for a cleaner, greener outdoor oasis!