
Propagation
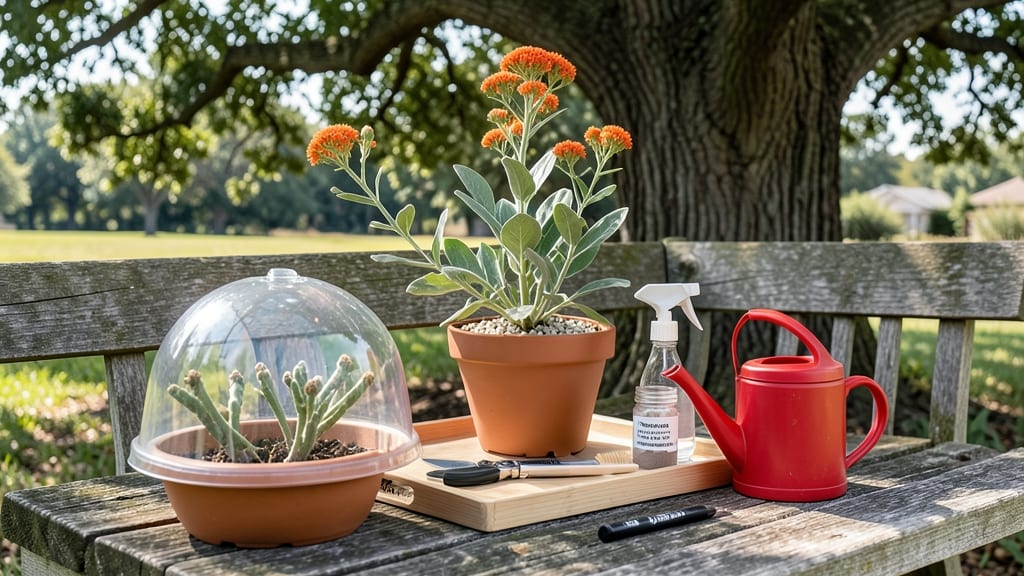
Growing milkweed from cuttings gives you fast root growth in 4 weeks—no waiting for seeds to sprout or struggling with transplants. 🌱 I’ve propagated milkweed this way for years, and once you see those first white roots appear, you’ll never go back to seeds again.
The key is timing: take cuttings in early summer when the plant is actively growing but before the heat peaks.
You’ll need sharp pruners, rooting hormone (optional but helpful), small pots with drainage, and a mix of perlite and potting soil. Most milkweed species—like common milkweed (Asclepias syriaca) or butterfly weed (Asclepias tuberosa)—root easily from cuttings, though tropical species may need extra humidity.
The process is simple but requires patience for those first few weeks while roots establish.
By week 4, you’ll have sturdy young plants ready to transplant, and they’ll bloom just like their parents the following season. The real magic? These cuttings attract monarch butterflies almost immediately, turning your garden into a buzzing butterfly highway.
Just avoid overwatering—the biggest mistake beginners make—and keep the soil lightly moist.
This method works for both beginners and experienced gardeners, whether you’re expanding your milkweed patch or sharing plants with neighbors. Once you master it, you’ll have a steady supply of native milkweed to support pollinators year after year. Ready to give it a try?
📚 In This Guide
- What you need
- Instructions
- Tips and common mistakes
- Wrapping up and next steps
What you need
- ● Healthy milkweed cuttings: 4–6 inch (10–15 cm) long, taken from non-flowering stems (use sharp, sterile scissors or pruners). Aim for 3–4 cuttings per plant for best results.
- ● Rooting hormone: A powder or gel (e.g., Clonex or Rootone) to boost root growth—1 small container (2–4 oz) is plenty.
- ● Well-draining potting mix: A blend of perlite, vermiculite, or sand (50% potting soil, 50% amendment) to prevent rot. 1 small tray or 4-inch pots per cutting.
- ● Clear plastic bags or domes: To create a humid environment (e.g., 1–2 zip-top bags or a propagation dome).
- ● Spray bottle: With water to mist cuttings daily (a 4 oz (120 mL) bottle works well).
- ● Labeling tags: To track varieties (e.g., 3–5 wooden or plastic tags).
- ● Pruning shears: For clean cuts (sterilize with rubbing alcohol).
- ○ Heat mat (optional): Set to 70–75°F (21–24°C) to speed up rooting (e.g., 1 small mat, 12"x24").
- ● Grow lights: If natural light is less than 6 hours/day (e.g., LED bulb, 1000 lumens).
- ● Fertilizer (diluted): A half-strength seaweed or fish emulsion (apply after roots form).
Step-by-step instructions for propagating milkweed from cuttings
Here’s how to clone milkweed in just 4 weeks—no fancy tools, just sharp scissors and patience.
🌱 Step 1: Select Healthy Stems and Prepare Cuttings
Choose 4- to 6-inch stems from the current season’s growth—they should be thick, green, and disease-free. Avoid woody stems; they root poorly. I like to take cuttings in late spring or early summer when the plant is actively growing.
Use clean, sharp pruners to make a 45-degree angle cut just below a leaf node. This increases surface area for root formation. Strip the lower 2 inches of leaves—this prevents rot and encourages roots to focus on the bare stem. Keep 2-3 leaves at the top to support photosynthesis during propagation.
💧 Step 2: Dip Cuttings in Root Hormone and Plant
Dip the cut end in rooting hormone powder (optional but speeds up rooting). Tap off excess to avoid clumping. Fill a 4-inch pot with a moistened mix of 50% perlite and 50% peat moss—this ensures fast drainage while retaining humidity.
Insert the cutting 1 inch deep into the mix, firming soil gently around it. Place 4 cuttings in one pot (they’ll crowd roots but share moisture). Water lightly until the mix feels evenly damp—not soggy. Cover the pot with a clear plastic bag to trap humidity, but leave it slightly open for airflow.
☀️ Step 3: Provide Warmth, Light, and Humidity
Place the pot in bright, indirect light—think east or north window or under grow lights. Milkweed cuttings need 70-75°F soil temps for best rooting. A seedling heat mat keeps roots warm if your home runs cooler. Mist the cuttings once daily to maintain humidity inside the bag.
Roots should appear in 2-3 weeks—you’ll see tiny white nubs at the base. Once roots are 1 inch long, remove the plastic gradually over 3-5 days to harden them off. Watch for new leaf growth—that’s your signal roots are established.
✂️ Step 4: Transplant Established Cuttings
After 4 weeks, gently remove the cuttings from the pot and rinse off excess soil. Trim any mushy or blackened roots with sterilized scissors—healthy roots are white or pale tan. Plant each cutting in a 6-inch pot with regular potting mix and 10% perlite for drainage.
Water deeply but let the top ½ inch of soil dry between waterings. Place in full sun outdoors or under grow lights for 12+ hours daily. Avoid transplanting until nights stay above 55°F—milkweed is frost-sensitive. You’ll have 4 strong, rooted plants ready for the garden in just a month!
Tips & tricks for perfect milkweed propagation
Milkweed propagation is faster than you think—here's how to avoid common pitfalls and maximize success.
Timing is Everything: Late spring or early summer is ideal for cuttings because this is when milkweed's growth hormones are most active. If you miss this window, fall cuttings can work too, but they may require a heat mat to maintain the 70-75°F soil temperature needed for rooting. I've found that cuttings taken in June consistently produce roots in just 2-3 weeks—that's why this method delivers such fast results.
Cutting Technique Matters: The 45-degree angle cut below a leaf node isn't just about aesthetics—it's about maximizing surface area for root formation. When you strip those lower 2 inches of leaves, you're preventing rot by eliminating excess moisture buildup at the base. Here's what nobody tells you: the 2-3 leaves you keep at the top should be the healthiest ones on the stem. Yellow or damaged leaves will slow down your cutting's recovery.
Soil Mix Secrets: That 50% perlite and 50% peat moss mix isn't arbitrary—perlite creates air pockets that prevent waterlogging while peat moss retains just enough moisture. Pro tip: After planting, gently press the soil around each cutting to eliminate air pockets. This ensures immediate contact between roots and soil. For even faster results, you can add a 10% vermiculite to the mix, which helps retain moisture while still allowing good drainage.
Humidity Control: The plastic bag creates a greenhouse effect, but it's crucial to leave it slightly open for airflow. If you completely seal it, you risk fungal growth that could kill your cuttings. I've had the best success by making a small slit in the bag—just enough to let excess moisture escape while maintaining humidity. Watch for condensation on the inside of the bag; if it's dripping, that's your signal to open it up a bit more.
Pro Tips for Milkweed From Cuttings
- Milkweed propagation is faster than you think—here's how to avoid common pitfalls and maximize success.
- Timing is Everything: Late spring or early summer is ideal for cuttings because this is when milkweed's growth hormon...
- Cutting Technique Matters: The 45-degree angle cut below a leaf node isn't just about aesthetics—it's about maximizin...
Frequently asked questions
Got questions about growing milkweed from cuttings?
Here are answers to the most common ones—so you can propagate like a pro!
How do I know if my milkweed cutting is ready to root?
Look for healthy, woody stems (about pencil-thick) with at least 3–4 nodes. Avoid soft, green growth—it’s not mature enough. A good cutting should snap (not bend) when you test it. Pro tip: Early morning is the best time to take cuttings when moisture levels are high!
Why isn’t my milkweed cutting rooting after 4 weeks?
Patience is key! Slow rooting can happen due to low humidity, poor lighting, or overwatering. Check your setup: roots need bright, indirect light (like a sunny windowsill) and a moist but not soggy medium. Try a humidity dome or misting daily. If the cutting rots, trim above the rot and replant!
Can I propagate milkweed from cuttings in water instead of soil?
Yes, but with caution! Milkweed roots slower in water and may rot if left too long. Use filtered or distilled water (chlorine can harm roots) and change it every 3–5 days. Once roots are 1–2 inches long (usually 4–6 weeks), transplant to soil. Warning: Some varieties struggle—soil propagation is often more reliable!
What’s the best time of year to take milkweed cuttings?
Late spring to early summer (May–June) is ideal when plants are actively growing. Avoid extreme heat or frost—both stress the plant and reduce rooting success. If you’re in a warm climate, fall cuttings can work too, but they may need extra humidity. Pro tip: Start indoors if your climate has harsh winters!
Can I reuse the rooting hormone after it dries out?
Nope! Once rooting hormone powder or gel dries, it loses effectiveness. Store unused powder in a cool, dry place (like a sealed container in the fridge), but gel must be used fresh. For powder, dip cuttings just before planting—no need to save it for later. Budget hack: Try homemade rooting hormone (like cinnamon or willow water) if you’re in a pinch!
Wrapping up and next steps
Growing milkweed from cuttings is a rewarding way to expand your garden quickly—especially when you see those roots forming in just four weeks! 🌱 With the right tools, patience, and a little care, you can propagate healthy plants that’ll attract monarch butterflies and boost your ecosystem.
Now that you’re armed with the know-how, why not try it this season? Grab those cuttings, set up your propagation station, and watch your milkweed thrive!
Next steps:
- Start with 3-4 inch cuttings from healthy stems.
- Monitor humidity and light—your secret weapons for success!
- Share your progress with fellow gardeners for extra motivation.