
Advice
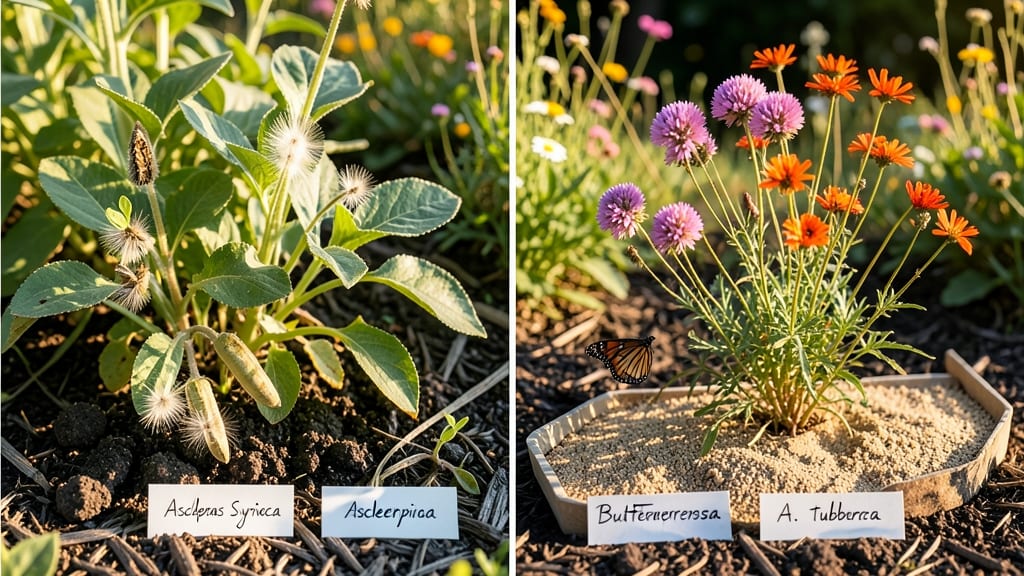
The stages of milkweed growth from seed to bloom are where the magic for monarch butterflies begins. 🌱 I've watched my own patches transform from tiny sprouts to towering nectar sources, and the timeline is surprisingly predictable once you know what to look for.
The first stage—germination—happens within 7-14 days when seeds get consistent moisture and warmth. Tiny roots push through the soil first, followed by two smooth, oval leaves that look nothing like the mature plant. This is when most people give up, but patience pays off here.
By stage 3 (vegetative growth), you'll see rapid upward progress—2-3 feet in a single season—with those signature milkweed leaves appearing. This is when pruning back leggy stems encourages bushier growth, and monarchs start investigating for egg-laying.
The flowering stage arrives in late summer, when clusters of pinkish-purple blooms attract pollinators by the dozens. Each bloom lasts just 2-3 days, but new buds keep appearing for 4-6 weeks, creating a continuous feeding frenzy for butterflies and bees.
📚 In This Guide
- What you need
- Instructions
- Tips and common mistakes
- Wrapping up and next steps
What you need
- ● Milkweed seeds: Choose native species like Asclepias tuberosa (butterfly weed) or Asclepias syriaca (common milkweed). Buy 50–100 seeds for a small garden patch or 200+ seeds for larger plantings.
- ● Seed-starting mix: 1–2 gallons of sterile, well-draining potting soil (avoid garden soil—it may harbor fungi).
- ● Growing containers: Seed trays or pots: 4–6" deep with drainage holes (use 10–20 trays for bulk starts).
- ● Grow lights or sunny windowsill: A LED grow light (12–16 hours/day) or a south-facing window with bright light.
- ● Watering can or spray bottle: With a fine mist nozzle to avoid displacing seeds.
- ● Clear plastic wrap or humidity dome: To retain moisture during germination.
- ○ Hand trowel or small shovel: For transplanting seedlings (optional but helpful).
- ● Pruning shears: To trim dead foliage or shape mature plants.
- ● Compost or slow-release fertilizer: Balanced 10-10-10 (1 tbsp per plant every 4–6 weeks).
- ● Monarch-friendly companions: Native grasses or wildflowers (e.g., Liatris) to attract pollinators.
- ○ Cold stratification setup (optional): Refrigerator with moist paper towels (for seeds needing cold treatment).
- ● Zip-top bag to seal seeds during stratification.
How to identify and support each stage of milkweed's monarch-friendly growth
Here's the clear timeline I use to nurture milkweed from seed to bloom—each stage brings monarchs closer.
🌱 Step 1: Germination (0-21 Days)
Milkweed seeds need stratification—mimic winter's cold to break dormancy. Place seeds in a sealed bag with damp sphagnum moss and refrigerate for 6-8 weeks at 35-40°F. Check weekly—moss should stay moist but not soggy. After stratification, sow seeds ¼ inch deep in well-draining soil mix.
Germination takes 14-21 days at 70-75°F. You'll notice tiny cotyledons (first leaves) appear in clusters. Keep soil consistently moist but not waterlogged—overwatering causes damping-off, where seedlings collapse overnight. A humidity dome helps maintain steady moisture until sprouts emerge.
🌿 Step 2: Seedling Growth (3-6 Weeks)
Once seedlings reach 2-3 inches tall, they'll develop their second set of true leaves—these look like small, narrow milkweed leaves. This is when roots establish rapidly, so keep soil evenly moist (about 1 inch of water weekly). Too little water causes wilting, but too much leads to fungal issues.
Thin seedlings to 6 inches apart when they're 4-6 inches tall. Use scissors to cut unwanted plants at soil level—pulling risks disturbing roots of remaining seedlings. Stronger stems will show deep green color and upright growth. If stems stretch toward light, move plants within 12 inches of a south-facing window or under grow lights for 14 hours daily.
☀️ Step 3: Vegetative Maturity (6-12 Weeks)
At 6-12 inches tall, milkweed enters its vegetative phase, producing longer, broader leaves and thick stems. This is when monarch caterpillars first appear—look for chewed leaves as a sign of activity. Water at the base (not overhead) to prevent fungal spores from splashing onto leaves.
Apply a balanced fertilizer (10-10-10) every 4-6 weeks to encourage robust growth. You'll see new leaves unfurling daily and stems thickening. If leaves yellow, reduce watering—milkweed prefers moderate moisture but hates soggy roots. Mulch with 2-3 inches of organic matter to retain soil moisture and suppress weeds.
🌸 Step 4: Flowering and Pollination (12-16 Weeks)
When stems reach 2-3 feet tall, umbel-shaped flower clusters emerge from the top. These pinkish-purple blooms attract monarchs and other pollinators. Each flower lasts 3-5 days, so expect continuous blooming for 4-6 weeks per plant. Deadhead spent blooms to encourage more flowers—simply pinch off faded clusters with your fingers.
Milkweed flowers produce seed pods after pollination. These green, sausage-shaped pods (up to 4 inches long) take 6-8 weeks to mature. Leave pods on the plant—monarchs lay eggs on them, and the pods provide food for caterpillars. Once pods turn brown and papery, they're ready for collection.
🌱 Step 5: Seed Production and Cycle Renewal (16-20 Weeks)
When pods split open, fluffy seed tufts emerge—each contains hundreds of tiny seeds. Collect seeds by placing a paper bag under the plant and gently shaking pods. Store seeds in the fridge for stratification (repeat Step 1) to grow next season's milkweed. You'll have 4-6 plants ready for monarchs by following this cycle.
After seed collection, cut back dead stems to 6 inches tall to encourage new growth from the base. Milkweed often self-seeds, so you may see volunteers popping up nearby—leave these unless overcrowding occurs. With proper care, one plant produces enough seeds to sustain a small monarch population for years.
Tips & tricks for growing thriving monarch milkweed
These targeted insights will help you avoid common pitfalls and maximize monarch success at every growth stage.
Stratification Success: The 6-8 week cold treatment at 35-40°F is non-negotiable for breaking milkweed seed dormancy. I use a second refrigerator shelf for more consistent temperature control—avoid door shelves where temps fluctuate wildly. For visual confirmation, place a thermometer inside the bag. If your fridge runs warmer than 40°F, extend stratification by 1-2 weeks to compensate.
Germination Environment: During the 14-21 day germination window at 70-75°F, maintain humidity with a clear plastic dome or plastic wrap over the container. Remove it daily for 10 minutes to prevent mold—condensation buildup is the #1 cause of seedling failure. I place my germination setup on a heating mat set to 75°F for more consistent warmth, especially in cooler homes. The humidity dome creates a mini greenhouse effect that mimics tropical conditions milkweed seeds prefer.
Seedling Light Management: When seedlings reach 2-3 inches and you're moving them to grow lights, position them 6-8 inches below the bulbs to prevent leggy growth. I use full-spectrum LED grow lights on a timer for the full 14 hours daily—regular household bulbs won't provide the blue spectrum needed for healthy development. Rotate your seedlings quarter-turn daily to ensure even growth toward all light sources, preventing them from growing crooked.
Pollinator Attraction Boost: In Step 4 when flowers appear, sprinkle a thin layer of bee-friendly pollen (available at garden centers) on the umbel clusters to enhance pollination. Monarchs are particularly drawn to milkweed with abundant nectar. I also plant companion flowers like lantana or coneflowers nearby—these attract pollinators that will visit your milkweed, increasing fertilization rates. The continuous blooming window of 4-6 weeks gives monarchs multiple opportunities to feed and lay eggs throughout the season.
Pro Tips for Milkweed Growth Stages
- These targeted insights will help you avoid common pitfalls and maximize monarch success at every growth stage.
- Stratification Success: The 6-8 week cold treatment at 35-40°F is non-negotiable for breaking milkweed seed dormancy....
- Germination Environment: During the 14-21 day germination window at 70-75°F, maintain humidity with a clear plastic d...
Frequently asked questions
Got questions about milkweed growth?
You’re not alone! Whether you're a first-time gardener or a monarch butterfly enthusiast, understanding the stages can feel tricky. Here are answers to the most common questions to help you grow thriving milkweed plants.
How long does it take for milkweed seeds to germinate?
Milkweed seeds can take anywhere from 10 days to several months to germinate, depending on conditions. Cold stratification (chilling seeds for 30–60 days) mimics winter and speeds up the process. Plant seeds in fall or early spring for the best results—patience is key!
When is the best time to plant milkweed seeds?
For fastest growth, sow seeds in early spring (March–April) after the last frost or in late summer (August–September) for a fall-winter germination. Avoid planting in extreme heat—seeds need moisture and cooler temps to sprout. Pro tip: Label your seeds! Milkweed can self-seed aggressively.
Why aren’t my milkweed seeds sprouting?
Common culprits include lack of stratification, dry soil, or poor seed viability. Try soaking seeds in warm water overnight before planting, or mix them with damp sand and refrigerate for 2–3 months. If seeds are older than 2 years, germination rates drop—opt for fresh seeds!
How do I know if my milkweed is ready for monarch butterflies?
Monarchs love milkweed with tender, new growth (early spring) and seed pods (late summer). Look for puffballs (seed fluff) or milky sap—these signal the plant is nutrient-rich. Avoid over-fertilizing; monarchs prefer native, chemical-free milkweed.
Can I grow milkweed indoors or in containers?
Yes! Start seeds in 4–6 inch pots with well-draining soil and place them in a sunny window or under grow lights. Transplant outdoors after the last frost. For containers, choose Asclepias tuberosa (butterfly weed)—it’s compact and drought-tolerant. Just ensure pots are at least 12 inches deep for root growth.
Still stumped? Drop your milkweed questions in the comments—we’re happy to help!
Wrapping up and next steps
Understanding milkweed growth stages isn’t just about patience—it’s about nurturing the future of monarch butterflies! 🌱 From tiny seeds to vibrant blooms, each phase plays a crucial role in creating a thriving habitat. Whether you’re a gardener, conservationist, or curious learner, your efforts make a real difference.
Ready to take the next step? Plant your seeds today and watch your garden transform into a monarch magnet! Share your progress with fellow enthusiasts or explore local conservation programs to amplify the impact. Every seed sown is a step toward a brighter, butterfly-filled world! 🦋