
Vegetables
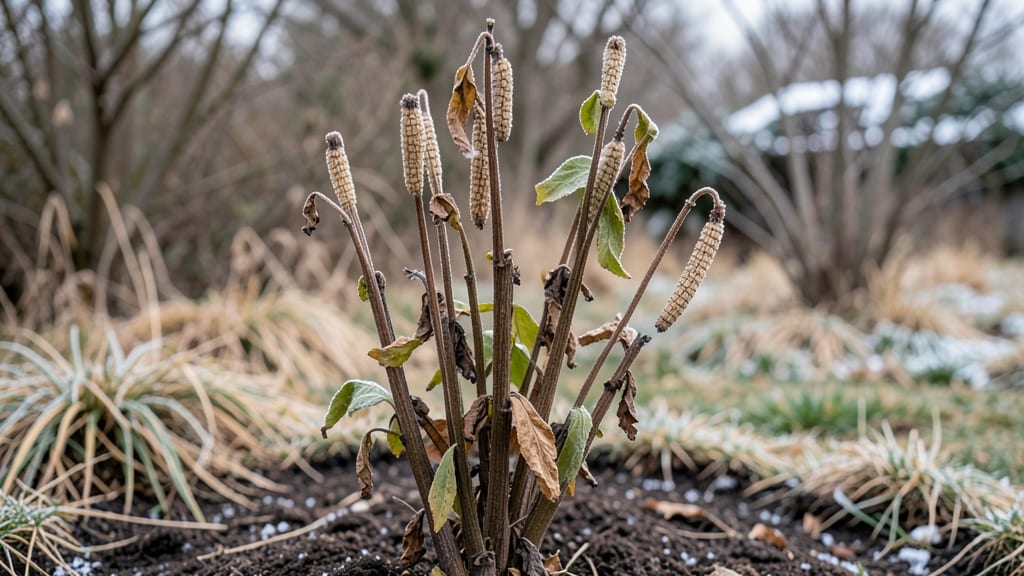
Winter doesn’t kill milkweed—it just puts it in hibernation mode. 🌿 This hardy perennial stays alive through freezing temps, but a little prep ensures it returns stronger than ever in spring.
I’ve watched my milkweed stand tall through snowdrifts, its skeletal stems acting as a winter skeleton for monarchs to find. The secret isn’t complicated: mulch heavily (3-4 inches) around the base to insulate roots, and avoid cutting back until new growth appears in spring.
Evergreen varieties like butterfly weed (Asclepias tuberosa) handle cold best, while tropical types need winter protection in colder zones. By spring, you’ll see fresh growth emerging from the ground, with flowers returning in 6-8 weeks.
The plants reward your patience with vibrant blooms and a steady supply of nectar for pollinators. Works for gardeners in zones 3-9, though extra care helps in extreme cold. Here’s how to keep it thriving through the chill.
📚 In This Guide
- What you need
- Instructions
- Tips and common mistakes
- Wrapping up and next steps
What you need
- ● Cold-hardy milkweed plants (e.g., Asclepias syriaca or Asclepias tuberosa—choose varieties rated for your USDA hardiness zone).
- ● Organic mulch: 2–3 inches of straw, shredded leaves, or pine needles (cover the base of plants after the first frost).
- ● Burlap or frost cloth: Enough to wrap around plants or create a loose tent (1–2 sheets per plant, depending on size).
- ● Garden twine or stakes: To secure frost cloth in windy conditions.
- ● Pruners or shears: Sharp, clean tools for trimming dead foliage (sterilize with rubbing alcohol).
- ○ Compost or slow-release fertilizer: 1–2 cups per plant in early spring (optional but helpful for spring regrowth).
- ● Thermometer: Soil or air thermometer to monitor winter temps (aim for above 10°F (-12°C) for best survival).
- ● Mini greenhouse or cold frame: For delicate seedlings or container-grown milkweed.
- ● Watering can with a rose attachment: For gentle hydration during dry winter snaps.
- ● Plant markers: To label varieties if testing multiple species.
Instructions for winterizing milkweed: protecting your plants through the cold
Milkweed thrives year-round with the right winter care—here’s how to keep yours healthy until spring.
🌿 Step 1: Assess Your Milkweed’s Cold Tolerance
Most milkweed varieties are cold-hardy, but young plants or tropical species like Asclepias curassavica need extra protection. Start by checking your plant’s maturity—mature milkweed with established roots can handle 10-20°F without issues. If your plant is new or in a container, it’s more vulnerable to frost damage.
Look for signs of stress like brown stems or wilted leaves, which mean it’s struggling with cold. If your milkweed is in the ground, it’s likely fine, but potted plants may need relocation. I always move mine to a sheltered spot like a garage or under an eave before temperatures dip below 25°F for more than a few hours.
❄️ Step 2: Mulch Heavily to Insulate Roots
Spread 3-4 inches of mulch around the base of your milkweed, especially if it’s in the ground. Use straw, shredded leaves, or pine needles—they trap heat and protect roots from freezing. Avoid using fresh wood chips, as they can draw moisture away from the soil.
Pile mulch higher around the root zone, creating a volcano shape to shield the crown. This prevents frost from penetrating deep into the soil. I like to add a layer of cardboard or burlap over the mulch for extra insulation in extreme cold snaps. Check the mulch every few weeks to ensure it hasn’t compacted or shifted.
🪴 Step 3: Protect Potted Milkweed from Freezing
If your milkweed is in a container, move it to a protected location like a garage, shed, or against a south-facing wall. Potted plants are at high risk of freezing because their roots can’t absorb warmth from the ground. Wrap the pot in bubble wrap or frost cloth to add an extra barrier against cold winds.
Water the plant lightly before moving it—slightly moist soil holds heat better than dry soil. Avoid overwatering, as soggy soil can freeze and damage roots. If you can’t move the pot indoors, bury it in the ground up to the rim, leaving only the top of the pot exposed. This mimics in-ground protection and keeps roots insulated.
☀️ Step 4: Monitor and Adjust for Late Winter Thaws
Milkweed can suffer from freeze-thaw cycles, where roots expand and contract with temperature swings. If you notice new growth in late winter, it’s a sign the plant is waking up early. Cover it with frost cloth or a light blanket during cold snaps to prevent damage.
Check the mulch periodically—if it’s soggy from melting snow or rain, fluff it up to maintain airflow. Once the last frost date passes (usually mid-April in most zones), remove the mulch and frost protection gradually. Let the plant acclimate to outdoor conditions over 5-7 days to avoid shock.
⏰ Step 5: Prune Dead Growth in Early Spring
When new shoots emerge in spring, it’s time to assess winter damage. Cut back any blackened or mushy stems at the base, but leave healthy green growth intact. Milkweed is surprisingly resilient—even if it looks dead, roots often survive and regrow.
Wait until after the last frost before pruning, as early cuts can expose tender new growth to cold. Fertilize lightly with a balanced organic fertilizer once new leaves appear to encourage strong regrowth. Your milkweed will reward you with vibrant blooms and monarch butterflies by summer!
Tips & tricks for winterizing milkweed
Took me years to figure out the best way to keep milkweed thriving through winter—here’s what actually works.
Cold Tolerance Check: When assessing your milkweed’s readiness for winter in Step 1, focus on the root system rather than just the leaves. Gently scratch away a little soil around the base—if you see healthy, white roots, your plant is well-established and can handle down to 10-20°F. Dark, mushy roots mean it needs extra protection. I’ve seen mature plants survive -10°F with proper care, but young ones won’t last below 25°F without help.
Mulch Like a Pro: The 3-4 inches of mulch in Step 2 should be fluffy, not compacted. I use a mix of straw and fallen leaves—it traps heat better than single materials. For extreme cold snaps, add a layer of cardboard or burlap over the mulch. This creates an insulating blanket that can raise soil temperatures by 5-10°F. Just remember to check it every few weeks to prevent mold buildup from trapped moisture.
Potted Plant Hack: If your milkweed is in a container, don’t just move it to a sheltered spot—give it a head start. Water it lightly the day before moving, then wrap the pot in bubble wrap or frost cloth. This extra barrier can make the difference between survival and damage. For extra protection, bury the pot up to its rim in the ground, leaving only the top exposed. This mimics in-ground conditions and keeps roots insulated.
Spring Prep Secret: When pruning dead growth in Step 5, don’t rush to cut everything back. Wait until you see new green shoots emerging—this is your sign that the roots survived winter. Cut back only the blackened or mushy stems, leaving the healthy growth intact. I’ve seen milkweed come back from what looked like total death, so give it a chance before giving up!
Pro Tips for Milkweed In The Winter
- Took me years to figure out the best way to keep milkweed thriving through winter—here’s what actually works.
- Cold Tolerance Check: When assessing your milkweed’s readiness for winter in Step 1, focus on the root system rather ...
- Mulch Like a Pro: The 3-4 inches of mulch in Step 2 should be fluffy, not compacted. I use a mix of straw and fallen ...
Frequently asked questions
Got questions about keeping milkweed thriving through winter’s chill? You’re not alone! Here are answers to the most common concerns—from survival tips to troubleshooting—so your milkweed stays strong and stunning all season long.
Can milkweed survive freezing temperatures?
Yes! Most milkweed species (like Asclepias syriaca or Asclepias tuberosa) are cold-hardy and can tolerate temps down to -20°F (-29°C) with proper prep. Mulch heavily (3–4 inches of straw or leaves) and avoid overwatering before winter to protect roots. Young plants may need extra shelter—try wrapping them in burlap or using a frost cloth.
When should I cut back dead milkweed stems in winter?
Wait until late winter or early spring (just before new growth appears). Cutting too early removes protective insulation for overwintering monarch butterfly eggs or pupae. If you’re unsure, leave stems standing until March or April—they’ll look messy, but it’s worth it for pollinators! Use clean, sharp shears to avoid disease.
What if my milkweed looks brown and crispy after frost?
Don’t panic! Brown stems are normal—milkweed conserves energy by going dormant. Focus on the roots and crown (the base where leaves meet the stem). If they’re still firm, your plant will rebound in spring. Overwatering or soggy soil can cause rot, though, so ensure good drainage. Trim dead foliage in early spring to encourage fresh growth.
Are there winter-hardy milkweed alternatives for colder climates?
If your zone is Zone 3 or colder, try these resilient picks:
Check your local nursery for region-specific varieties!
Will monarch butterflies still use milkweed in winter?
Monarchs won’t overwinter on milkweed in cold climates—they migrate! But leaving dead stems provides shelter for overwintering eggs or pupae in milder zones (like Zones 7–10). If you live in a warm area, consider planting Asclepias curassavica (tropical milkweed), which stays green year-round and supports monarchs year-long.
Wrapping up and next steps
Milkweed’s winter resilience is a testament to nature’s ability to thrive even in the coldest months—proving that beauty and hardiness go hand in hand! 🌿 Whether you’re a gardener looking to extend your plant’s life or simply curious about cold-weather survival, milkweed offers a rewarding challenge. Ready to take the next step? Start small by planting a few hardy varieties in a sheltered spot, or dive deeper into companion planting to create a winter-friendly ecosystem.
Every little effort helps support pollinators and adds a touch of green to your winter landscape!