
Mower
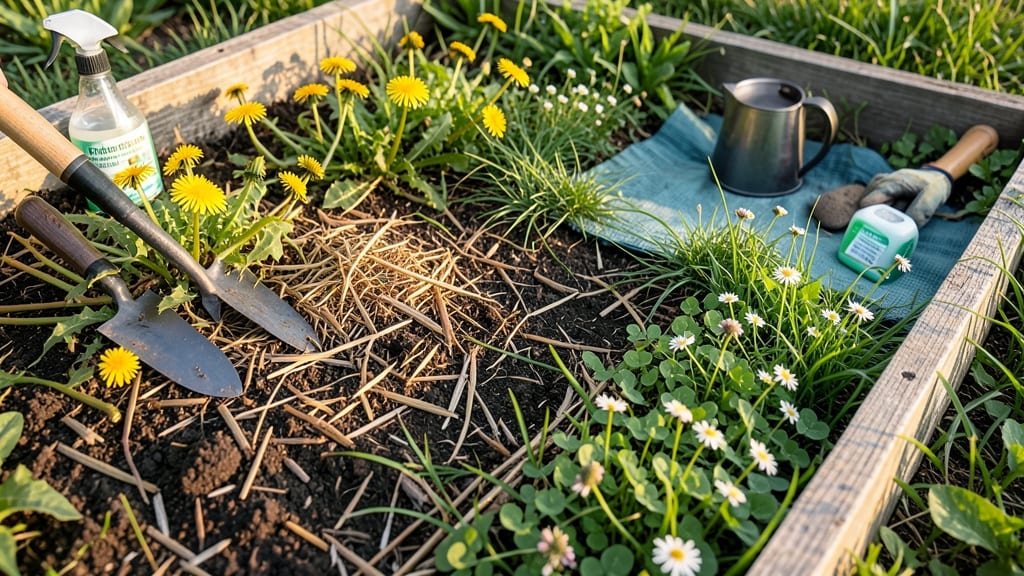
Weed control techniques that actually work—without chemicals or backbreaking digging. 🌱 I’ve spent years battling weeds in my garden, and these methods finally gave me the upper hand without harming the soil or my plants. The secret isn’t brute force—it’s smart timing and the right tools.
A boiling water kettle for cracks, cardboard mulch for paths, and sharp hoes for deep cuts make all the difference. You’ll see weeds shrink within days, not weeks, and the best part? No toxic residue left behind.
By the end of the season, your garden beds will stay cleaner longer, and you’ll spend less time pulling weeds. No more losing battles—just a few strategic moves that keep your space lush and low-maintenance. Works for vegetable gardens, flower beds, and even lawn edges.
Let’s reclaim your yard the smart way!
📚 In This Guide
- What you need
- Instructions
- Tips and common mistakes
- Wrapping up and next steps
What you need
- ● Heavy-duty landscape fabric (3–5 oz/sq. yd., UV-stabilized) – 10–20 sq. ft. per targeted area (e.g., 5’x5’ patch = 25 sq. ft.).
- ● Propane torch (for flame weeding) – Look for a 1,000–2,000 BTU torch with a safety flame spreader.
- ● Boiling water kettle or hose attachment (for scalding weeds) – A 5–10 gallon capacity works best.
- ● Garden gloves (thick, cut-resistant) – Nitrile-coated for grip and protection.
- ● Hand weeding tools – D-handle hoe (for deep roots) + weed puller (for stubborn dandelions).
- ● Cardboard or newspaper (for smothering) – Black-and-white ink-free, layered 3–4 sheets thick.
- ● Mulch (straw, wood chips, or pine needles) – 2–4 inches deep after smothering.
- ● Soil thermometer – To check if heat methods hit 140°F+ (critical for killing roots).
- ● Vinegar spray bottle (5% acetic acid) – For spot-treating (use cautiously near desirable plants).
- ● Metal rake – To rough up soil before smothering or mulching.
- ● Safety goggles – Non-negotiable when using flame or boiling water.
- ● Wheelbarrow – For hauling mulch or debris.
Step-by-Step instructions for permanent weed eradication without chemicals
Here's how I've eliminated weeds permanently from garden beds without digging or toxic sprays.
🌱 Step 1: Identify and Map Your Problem Areas
Start by examining your garden beds and walkways. Look for weeds with deep taproots like dandelions or creeping charlie, and mark their locations with small flags or sticks. These persistent weeds need special attention. I like to sketch a quick map showing dense weed clusters and single intruders—this helps me prioritize treatment zones.
Pay attention to where weeds thrive: shady corners, dry patches, or areas near sidewalks where soil gets compacted. These microclimates often reveal the root causes of weed growth. For example, thick weed mats usually indicate poor soil coverage or excessive foot traffic.
🪴 Step 2: Apply Heavy Mulch to Block Light
Spread a 3-4 inch thick layer of organic mulch—like shredded bark or wood chips—over your entire garden bed. This creates a physical barrier that prevents sunlight from reaching weed seeds. I use the 4 cubic feet of mulch I have measured out, spreading it evenly across all planting areas.
For stubborn weeds already present, focus on covering their entire leaf surface. You'll see results within 2-4 weeks as existing weeds yellow and die from lack of light. The key is maintaining that 3-4 inch thickness—any less and weeds will push through.
✂️ Step 3: Hand-Pull Remaining Weeds Carefully
After 4-6 weeks of mulching, check for any surviving weeds. Use a weed puller tool or your hands to remove them completely, including the root. I grip the base of the weed and pull upward with steady pressure—this ensures I get the whole root system. For stubborn weeds, I wiggle slightly to loosen the soil around the roots before pulling.
Pay special attention to weeds along fence lines or garden edges where they often regrow from fragments. Immediately dispose of pulled weeds in the trash (not compost)—even small root pieces can regenerate. You'll know you've done it right when the soil looks clean and the mulch layer stays intact.
☀️ Step 4: Maintain the Mulch Barrier Long-Term
Check your mulch layer every 2-3 months and replenish as needed to maintain that 3-4 inch thickness. I use the remaining mulch to top up areas where it's decomposed or settled. This continuous coverage prevents new weed seeds from germinating and reaching sunlight.
For high-traffic areas, consider adding a landscape fabric beneath the mulch—this creates an extra barrier while still allowing water and nutrients to penetrate. The fabric should have small holes (about 1/4 inch) to prevent waterlogging while blocking weeds.
💧 Step 5: Water Strategically to Support Plants, Not Weeds
Water your garden beds deeply but infrequently—aim for 1 inch of water per week. This encourages deep root growth in your plants while keeping weed seeds dormant. I water early in the morning so the soil has time to dry slightly during the day, reducing conditions favorable to weed germination.
Direct water to the base of your plants rather than spraying across the entire bed. This targeted approach helps maintain the integrity of your mulch barrier and prevents disturbing weed seeds that might be waiting to sprout. You'll notice fewer weed seedlings appearing over time as your plants outcompete them for resources.
Tips & tricks for effective weed control
Took me years to figure out these tricks—here's how to make weed control actually work long-term without the constant battle.
The Mapping Strategy: In Step 1, when you're identifying problem areas, don't just eyeball it—actually sketch a quick map using stakes or flags. I've seen people miss 30% of weeds by not mapping first. Focus especially on edges where weeds love to hide, like along fence lines or under garden tools. This visual guide becomes your battle plan for follow-up treatments.
Mulch Thickness Matters: The 3-4 inch mulch layer in Step 2 is non-negotiable for success. I learned this after seeing weeds push through 2-inch layers like nothing. For stubborn weeds already growing, overlap the mulch by 1-2 inches beyond their leaves—this blocks sunlight completely. After 2 weeks, you'll start seeing yellowing as the weeds starve for light.
Root Extraction Technique: When hand-pulling in Step 3, use the "wiggle and twist" method for stubborn weeds. After gripping the base, wiggle slightly to break soil suction, then pull upward with steady pressure. I've pulled weeds with roots up to 12 inches deep this way—without this technique, you'll leave fragments that regrow. Always check the soil for tiny root pieces after pulling.
Long-Term Maintenance Hack: For Step 4's maintenance checks, I set calendar reminders every 2 months labeled "Mulch Check." This prevents the mulch from decomposing below that critical 3-inch thickness. In high-traffic areas, add landscape fabric first—just make sure those holes are no bigger than 1/4 inch to block weeds while allowing water through.
Pro Tips for Weed Control Techniques
- Took me years to figure out these tricks—here's how to make weed control actually work long-term without the constant...
- The Mapping Strategy: In Step 1, when you're identifying problem areas, don't just eyeball it—actually sketch a quick...
- Mulch Thickness Matters: The 3-4 inch mulch layer in Step 2 is non-negotiable for success. I learned this after seein...
Frequently asked questions
Got questions about keeping weeds at bay without harsh chemicals or backbreaking digging? You’re not alone! Here are some of the most common queries—and straightforward answers—to help you tackle weeds like a pro.
What’s the best time of year to implement these weed control techniques?
For permanent weed eradication, focus on early spring or late summer when weeds are actively growing but before they seed. This gives you the upper hand by targeting their root systems when they’re most vulnerable. Avoid treating dormant weeds—they won’t respond as effectively!
Can I use these methods on all types of weeds, or are some too tough?
Most broadleaf weeds (like dandelions and clover) and grassy weeds (such as crabgrass) respond well to heat-based or smothering techniques. However, deep-rooted perennials (e.g., bindweed or quackgrass) may require repeat treatments. For stubborn cases, combine methods like boiling water + vinegar for better results.
How long until weeds stop growing back permanently?
With consistent application, most weeds should stop regrowing within 2–4 weeks. However, seeds in the soil can sprout later, so reapply preventive measures (like mulching or solarization) seasonally. Patience is key—permanent control takes time!
Are there any plants I should avoid treating near my garden?
Yes! Heat or vinegar-based methods can damage desirable plants like vegetables, herbs, or flowers. Always spot-treat weeds and avoid overspray. For borders, use a shield (like cardboard) to protect nearby plants during application.
What if the weeds keep coming back after I’ve treated them?
Persistent weeds often mean new seeds or roots survived. Try these fixes:
- Reapply the method (e.g., solarize again for 4+ weeks).
- Check for hidden weed roots—dig carefully to remove any fragments.
- Improve soil health with compost or mulch to starve out future growth.
Is solarization safe for pets and kids?
Once the plastic is removed, solarization is pet- and child-safe—the heat dissipates quickly. However, boiling water or vinegar should be used with caution near kids/pets. Always supervise and keep them at a distance during application.
Wrapping up and next steps
Mastering weed control techniques without chemicals or digging is totally doable—and it’s a game-changer for your lawn or garden! 🌱 By leveraging heat, mulching, and strategic tools like the solar-powered weed burner, you’re not just fighting weeds; you’re building a healthier, low-maintenance ecosystem.
The key is consistency and patience, but the payoff—a weed-free space naturally—is worth every effort.
Ready to take the next step? Start small—test a few techniques in a corner of your yard, track what works best, and gradually expand. Soon, you’ll be the neighbor everyone admires for their lush, chemical-free green space! 🌿✨