
Landscaping
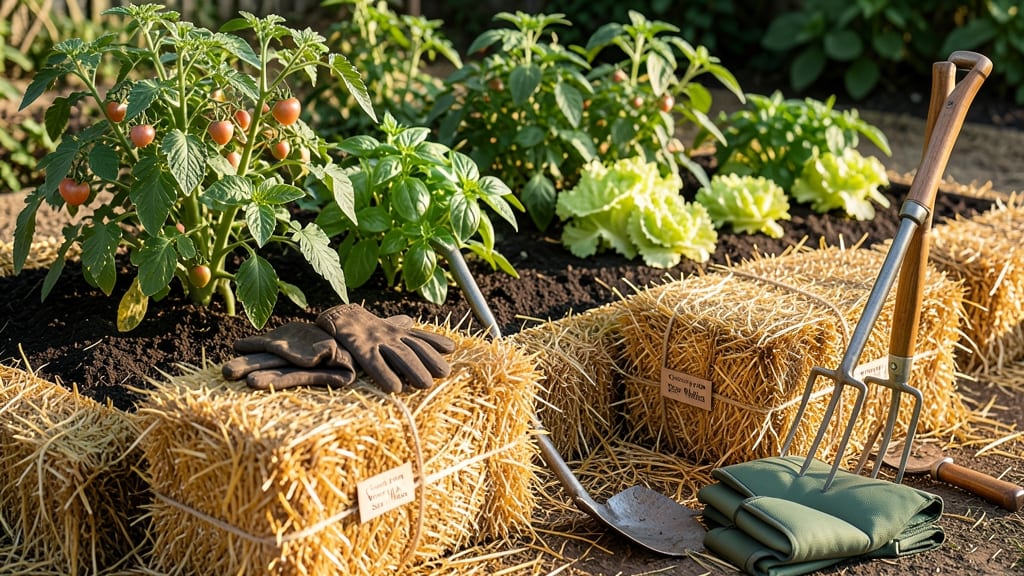
Weed-free straw mulch isn’t just mulch—it’s your first line of defense against invasive weeds while keeping soil healthy. 🌱 I’ve battled crabgrass and cheatgrass for years until I discovered how certified weed-free straw transforms garden beds into low-maintenance, weed-resistant zones.
The difference is night-and-day: no more pulling stubborn sprouts or watching weeds outcompete your plants.
Here’s the thing—not all straw is created equal. Certified weed-free straw is processed to eliminate seeds, so what you’re really buying is a protective layer that suppresses weeds naturally.
Look for labels that say "weed-free" or "seed-free," and avoid hay or grass clippings, which are basically weed starter packs. A 3-4 inch thick layer blocks sunlight, starving weeds while keeping soil moist and cool for your plants.
Once you lay it down, maintenance is minimal: just replenish as it breaks down. The straw breaks down slowly, feeding soil over time while keeping weeds at bay.
You’ll see fewer weeds popping up, healthier soil structure, and plants that thrive without constant competition. It’s the kind of upgrade that makes gardening feel effortless.
For best results, apply in early spring or fall when weeds are least active, and keep an eye out for any volunteer weeds sneaking through. If you find a few, pull them immediately before they seed.
This mulch isn’t just a temporary fix—it’s a long-term investment in a garden that stays healthy with less work. Worth every bale.
📚 In This Guide
- What you need
- Instructions
- Tips and common mistakes
- Wrapping up and next steps
What you need
- ● Straw mulch: Certified weed-free (check labels for "weed-free" or "seed-free" guarantees). Quantity: 2–3 cubic yards per 100 sq. ft. (adjust based on depth—2–4 inches recommended).
- ○ Garden gloves: Heavy-duty, chemical-resistant (optional but helpful for handling straw).
- ○ Landscape fabric: Optional but recommended for extra weed suppression (10–15 sq. ft. per section, depending on area).
- ○ Compost or organic fertilizer: Optional (1–2 lbs. per 10 sq. ft. to enrich soil before mulching).
- ● Rake: Bow rake (for spreading straw evenly).
- ● Garden shovel or hoe: For clearing debris and prepping soil.
- ● Wheelbarrow: To transport straw (if not delivered).
- ● Hose with nozzle: For wetting straw lightly before application (helps it settle).
- ● Measuring tape: To ensure even coverage (2–4 inches thick).
- ● Clear the area of existing weeds, rocks, or debris (use a hoe or rake).
- ● Water the soil lightly before applying mulch (helps straw adhere and retain moisture).
- ○ Optional: Test soil pH (6.0–7.0 ideal for most plants) if amending with compost.
Step-by-Step guide for applying certified weed-free straw mulch
Here's how to create a weed-blocking layer that protects your soil while keeping it healthy and fertile.
🌱 Step 1: Prepare the Soil Surface
Start by clearing the planting area of any existing weeds, debris, or dead plant material. Use a hoe or hand weeder to remove weeds from the top 2-3 inches of soil—this prevents them from sprouting through your mulch later. I like to work on a dry day so the soil holds together better when I rake.
Once the area is clean, lightly rake the soil surface to create a fine, even texture. This helps the straw make better contact with the soil and improves water penetration. Avoid tilling deeply—you want to preserve soil structure and beneficial microorganisms near the surface.
💧 Step 2: Apply a Pre-Moistening Layer
Before adding straw, water the soil thoroughly until it's deeply moist to a depth of 4-6 inches. You'll know it's right when water runs out the bottom of the holes in your containers or when the top inch feels damp but not soggy. This step is critical because dry soil repels mulch and creates gaps where weeds can still grow.
Let the soil sit for 30-60 minutes after watering to allow excess moisture to absorb. This prevents the straw from absorbing all the water from the soil, which could leave your plants thirsty. I always do this step first because it sets up the whole process for success.
✂️ Step 3: Spread the Certified Weed-Free Straw Evenly
Spread the straw in a 2-4 inch thick layer over the prepared soil. Use your hands or a rake to distribute it evenly, avoiding clumps that could create gaps. I like to work in small sections—about 3x3 feet at a time
Leave a 1-2 inch gap between the straw and plant stems to prevent rot. This small space allows air to circulate and keeps the base of plants dry. If you're mulching around young seedlings, gently pat the straw down around the edges to secure it without smothering the stems. After spreading, lightly water the straw again to settle it and encourage it to break down slowly. This helps it form a tight barrier against weeds while still allowing water to reach the soil. You'll see the straw darken slightly and feel firmer after this step—that's your signal it's properly settled. Check the mulch layer every 2-3 weeks and add more straw if it decomposes below 2 inches. Over time, the straw will break down and blend into the soil, enriching it with organic matter. I always keep a small bag of extra straw on hand because replenishing is easier than starting from scratch. Inspect the mulched area regularly for any weeds that manage to sprout through. Certified weed-free straw is highly effective, but no method is perfect—especially in high-weed-pressure areas. If you spot any weeds, pull them immediately before they seed. I like to do this on a cloudy day when the soil is soft and weeds come out easily. This mulch also helps retain soil moisture and temperature, which means your plants will thrive with less frequent watering. You'll notice healthier soil over time as the straw decomposes, adding organic matter and improving structure. The goal is a balanced ecosystem where weeds can't compete with your desired plants.☀️ Step 4: Secure and Maintain the Mulch Layer
🌿 Step 5: Monitor for Weed Breakthroughs
Tips & tricks for perfect straw mulch application
These practical strategies will help you create a weed-blocking mulch layer that keeps your garden thriving without the hassle.
Timing is Everything: The 30-60 minute wait after initial watering in Step 2 is crucial—it allows excess moisture to absorb evenly, preventing the straw from becoming waterlogged. I've seen beginners skip this step and end up with soggy mulch that creates anaerobic conditions, which actually encourages weed seeds to germinate. Use a moisture meter if you're unsure, aiming for soil that's damp but not dripping.
Layer Consistency Matters: When spreading that 2-4 inch thick layer in Step 3, think of it like creating a blanket over your soil. Inconsistent thickness creates weak spots where weeds can still grow. I recommend working in those 3x3 foot sections and using a straight board as a guide to maintain even depth. For sloped areas, work across the slope rather than up and down to prevent erosion of your mulch layer.
Monitoring Strategy: The 2-3 week check interval in Step 4 is perfect for catching potential issues early. I've found that marking your garden sections with small stakes helps track which areas need attention. Look for these signs: darkening straw indicates proper settling, while uneven decomposition suggests moisture issues. Keep a small notebook nearby to record when you last refreshed each section—it's surprising how quickly straw breaks down in hot climates.
Seasonal Adjustments: In summer months, you may need to refresh your 2-inch minimum layer every 2-3 weeks, while in cooler seasons, 3-4 weeks might suffice. I always keep an extra bale of certified weed-free straw on hand for quick touch-ups. For high-traffic areas, consider adding a thin layer of landscape fabric under the straw to extend its lifespan, though this should only be used where plants aren't growing directly through the mulch.
Pro Tips for Certified Weed Free Straw Mulch
- These practical strategies will help you create a weed-blocking mulch layer that keeps your garden thriving without t...
- Timing is Everything: The 30-60 minute wait after initial watering in Step 2 is crucial—it allows excess moisture to ...
- Layer Consistency Matters: When spreading that 2-4 inch thick layer in Step 3, think of it like creating a blanket ov...
Frequently asked questions
What does "certified weed-free" actually mean?
"Certified weed-free" straw mulch has undergone rigorous testing to ensure it contains no viable weed seeds. Look for labels from reputable certifiers like the National Seed Trade Association (NSTA) or USDA. This means you’re getting mulch that won’t sprout unwanted plants—just pure organic matter to enrich your soil!
When is the best time to apply certified weed-free straw mulch?
The ideal time is early spring or late fall when weeds are less aggressive. Applying it after planting (but before germination) ensures it blocks weeds without smothering your crops. For perennials or established gardens, spring or after rain works best to keep moisture locked in.
Can I reuse old straw mulch if it’s weed-free?
Reusing straw mulch can work, but only if it’s completely free of seeds, debris, and disease. Sterilize it by baking at 200°F (93°C) for 30 minutes or soaking in a 1:9 bleach-water solution (let it dry fully first!). If unsure, opt for fresh certified mulch to avoid risks.
What’s the difference between straw and hay for mulching?
Straw
is processed from cereal crops (like wheat) and is seed-free—perfect for mulching. Hay, however, contains seeds (often weed seeds) and should never be used as mulch unless certified. Straw also breaks down slower, making it ideal for long-term weed suppression.
How do I troubleshoot weeds popping up in my straw mulch?
If weeds appear, they likely came from seed contamination or windborne seeds. Remove them immediately and check your mulch’s certification. For prevention:
- Use 3–4 inches of certified straw (thicker = better blockade).
- Reapply mulch annually in spring.
- Consider a landscape fabric barrier under mulch in high-weed areas.
Wrapping up and next steps
Choosing certified weed-free straw mulch is a game-changer for maintaining a lush, low-maintenance garden while protecting your soil’s health. By blocking weeds, retaining moisture, and improving soil quality, you’re not just saving time—you’re investing in a thriving landscape with minimal hassle. 🌱
Ready to transform your garden? Start by sourcing high-quality, certified weed-free straw mulch from trusted suppliers, then apply it confidently to your beds. Your future self (and your plants!) will thank you.