
How To
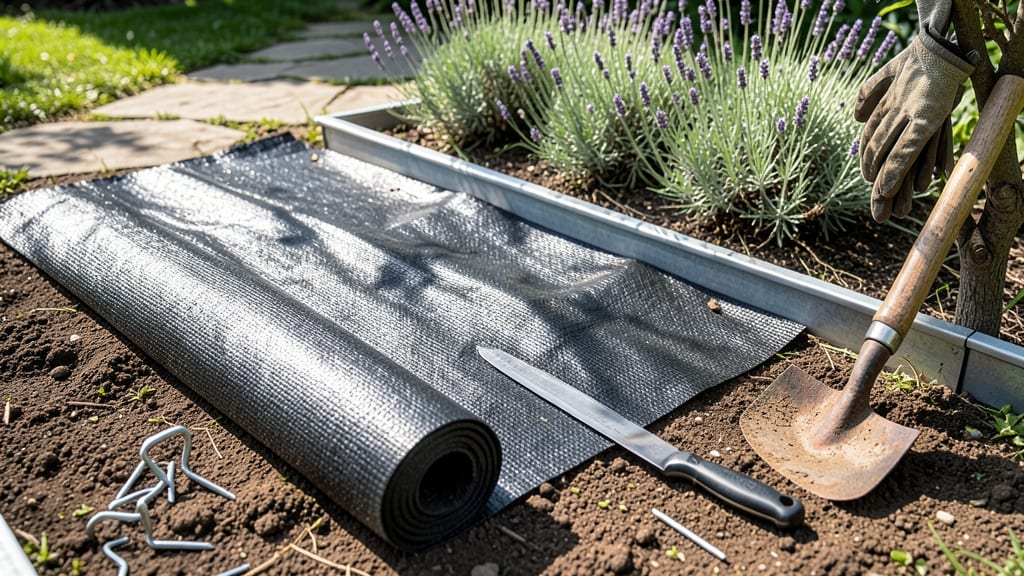
Laying a weed mat transforms your garden from a battleground to a low-maintenance paradise in just a weekend. ✨ I’ve used them to reclaim overgrown paths and flower beds—once you cover the soil, weeds can’t get a foothold, and your plants thrive without constant pulling.
The key is proper prep and placement, which I’ll break down so you skip the common mistakes that leave gaps for weeds to sneak through.
You’ll need a sturdy weed mat (landscape fabric or plastic), edging material, stakes, and a tape measure. Clear the area first—remove rocks, roots, and debris so the mat lies flat. For paths, use 12-inch-wide mats; for beds, overlap edges by 6 inches to block weeds completely.
Plastic lasts longer but lets less water through, while fabric allows some soil moisture to penetrate.
Start by laying the mat on bare soil, then secure the edges with landscape edging or heavy rocks. For paths, cut the mat to fit and overlap seams by 6 inches, stapling or weighing down the edges.
In beds, tuck the edges under mulch or plant roots to keep it in place. The result? A weed-free zone that stays clean with minimal effort—no more backbreaking pulling or herbicide sprays.
Pro tip: Add a layer of mulch on top of the mat for extra weed suppression and a polished look. Avoid walking on it if possible, as foot traffic can create gaps.
With the right setup, your weed mat will last 5-10 years, giving you more time to enjoy your garden instead of fighting it.
📚 In This Guide
- What you need
- Instructions
- Tips and common mistakes
- Wrapping up and next steps
What you need
- ● Weed mat (landscape fabric): Choose a non-woven polypropylene mat (1.2–2.0 oz/yd² density for durability). Size: Cover the area with 6–12 inches of overlap on all sides (e.g., for a 10’x10’ bed, buy ~12’x12’).
- ● Staple gun + 1¼” landscape staples: ~50–100 staples (depends on mat size; 1 staple every 12–18 inches).
- ● Shovel or spade: For digging trenches (if edging) or securing corners.
- ● Measuring tape: To mark and cut the mat precisely.
- ● Utility knife or scissors: For trimming excess mat cleanly.
- ○ Garden edging (optional but recommended): Plastic, metal, or stone edging to keep the mat in place and define borders. Length: Match the perimeter of your planting area + 10% for overlaps.
- ● Paving stones or gravel: To weigh down edges and prevent shifting.
- ● Landscape fabric tape: Seals seams to block weeds from sneaking through.
- ● Garden twine or zip ties: Temporary securing for windy areas.
- ● Gloves: Protect your hands from rough edges or dirt.
- ● Level or straight board: Ensures the mat lies flat before stapling.
Step-by-Step instructions for installing a weed mat
Here's the simple, foolproof method I use to keep weeds at bay for years—no chemicals, no backbreaking work.
🪴 Step 1: Choose and Prepare Your Landscape Area
Start by clearing the area where you'll install the weed mat. Remove any existing weeds, rocks, or debris using a garden fork or trowel—you want a clean, flat surface. I like to work in sections of about 4 feet by 4 feet to keep things manageable. If your soil is uneven, use a rake to smooth it out before proceeding.
This step is critical because buried weeds or rocks can poke holes in your mat, letting weeds grow right through. Take your time here, and you'll save headaches later. For slopes, consider using landscape staples to secure the mat later—just plan for that during prep.
🌱 Step 2: Lay the Weed Mat Securely
Unroll the weed mat over your prepared area, allowing it to overlap edges by at least 6 inches to prevent weeds from sneaking through gaps. The mat should lie flat—no wrinkles or bubbles. For extra security, especially in high-traffic areas, use landscape fabric staples or U-shaped pins to anchor the edges.
I always start in the center and work outward, smoothing the mat as I go. If you're covering a large area, have a helper hold one side while you secure the other—this prevents the mat from shifting and creating gaps. For paths or heavily walked areas, consider adding a layer of gravel or mulch on top to keep the mat in place.
☀️ Step 3: Secure and Maintain the Barrier
Once the mat is fully laid, secure it with landscape staples every 12-18 inches along the edges and at any seams. This keeps the mat from shifting with wind or foot traffic. For added durability, you can also use bricks, pavers, or mulch to weigh down the edges—just avoid anything that could tear the mat.
After installation, check your mat periodically for tears or gaps, especially after heavy rain or foot traffic. A quick repair with overlapping patches or staples keeps weeds at bay. The beauty of a weed mat is that once it's installed correctly, it lasts for years with minimal upkeep—just a little attention now saves hours of weeding later.
Tips & tricks for perfect weed mat installation
Common pitfalls—and how to sidestep every one—when creating your weed-free garden sanctuary.
Prep is Everything: In Step 1, don't rush clearing debris—especially those stubborn roots or rocks hiding just below the surface. I've learned the hard way that even small pebbles can create holes in the mat over time. Use a garden fork to dig down about 2 inches around the edges to catch anything lurking beneath. For slopes, consider laying a thin layer of landscape fabric first to create a smoother base before adding the mat.
Overlap Strategy: When laying your mat in Step 2, those 6-inch overlaps aren't just a suggestion—they're your first line of defense against weeds. For particularly troublesome areas like garden edges or near fences, increase overlaps to 8-10 inches. I like to use a straightedge or level to ensure the mat stays perfectly flat; any bubbles or wrinkles create weak spots where weeds can take root.
Securing Secrets: For Step 3, landscape staples are your best friend, but placement matters. Drive them at a 45-degree angle into the soil—not straight down—so they grip better. I've found that adding a staple every 6 inches along seams (instead of just the 12-18 inch spacing) creates an extra barrier against weeds trying to sneak through. For high-traffic areas, consider using a combination of staples and small pavers to weigh down the edges.
Long-Term Maintenance: The real secret to lasting results is your post-installation checks. I schedule a quick inspection every 3-4 months after heavy rains or seasonal changes. A simple repair kit with extra mat pieces and staples in your garden shed can save hours of weeding later. If you notice the mat shifting, don't just re-staple—add a layer of mulch or gravel on top to provide extra weight and stability.
Pro Tips for Lay A Weed Mat
- Common pitfalls—and how to sidestep every one—when creating your weed-free garden sanctuary.
- Prep is Everything: In Step 1, don't rush clearing debris—especially those stubborn roots or rocks hiding just below ...
- Overlap Strategy: When laying your mat in Step 2, those 6-inch overlaps aren't just a suggestion—they're your first l...
Frequently asked questions
Got questions about laying weed mats? You’re not alone—here are some of the most common concerns, answered clearly and simply!
What’s the best time of year to install a weed mat?
For best results, install your weed mat in early spring or fall when soil is workable but weeds aren’t aggressively growing. Avoid extreme heat or frost, which can damage the mat or make installation difficult. If you’re in a mild climate, spring is ideal—just before weeds sprout!
Can I reuse an old weed mat?
Generally, no—weed mats degrade over time from UV exposure, foot traffic, and weather. If yours is cracked, torn, or discolored, replace it. However, if it’s in good shape, you can flip it over to extend its life by 1–2 seasons before tossing it.
Are there cheaper alternatives to weed mats?
Yes! For small areas, try landscape fabric (thinner but effective short-term) or cardboard + mulch (DIY but less durable). For long-term solutions, gravel or wood chips also suppress weeds but require more maintenance. Weed mats strike a balance between cost and permanence.
What if weeds grow through the mat after installation?
This usually means the mat wasn’t secured properly or has gaps. Check for:
- Overlapping seams (leave 6–12 inches of overlap)
- Sharp edges poking holes (trim with scissors)
- Sinking mat (add landscape staples or rocks to weigh it down)
Do weed mats work under mulch or pavers?
Weed mats are perfect under mulch (like bark or straw) or pavers. Just ensure the mat is fully covered—exposed edges can let weeds sneak through. For pavers, use a 1-inch layer of sand over the mat to prevent shifting.
Wrapping up and next steps
Laying a weed mat is your game-changing move for a tidy, low-maintenance yard—no more battling stubborn weeds or wasting time on manual removal! 🌱 With the right prep, tools, and a few simple steps, you’ve got a permanent barrier that’ll keep your garden looking sharp for years.
Now that you’re armed with the know-how, it’s time to roll up your sleeves and transform your outdoor space.
Ready to take action? Pick your project date, gather your supplies, and start with a clean, clear area. Whether you’re tackling a small flower bed or a sprawling lawn, every weed-free inch begins with you—so go ahead and make it happen! 💪