
Neem Oil
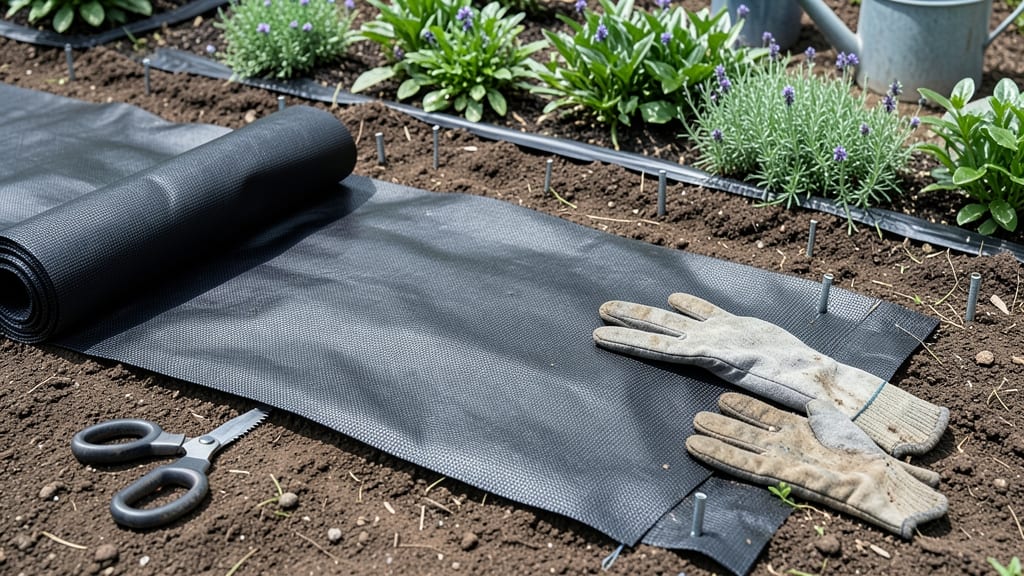
How to use weed barrier fabric isn’t just about laying down a piece of fabric—it’s the game-changer that saved my backyard garden from years of relentless weeds. 🌱 The right installation transforms your garden beds from battlegrounds to low-maintenance havens, where plants thrive and weeds stand no chance. This fabric works by blocking sunlight to weed seeds while allowing water and nutrients to reach your plants. It’s not about digging trenches or using toxic chemicals—just lay it down right, cover it properly, and watch your garden transform. I’ve used it under mulch, under soil, and even in raised beds, and the results speak for themselves: fewer weeds, healthier soil, and less work. You’ll need landscape fabric (not plastic or woven material), staples or landscape pins, and a thick layer of mulch or soil on top. The key is overlapping edges and securing them tightly—no gaps means no weeds. In just one season, you’ll notice the difference: cleaner beds, happier plants, and more time to enjoy your garden instead of fighting it. The best part? It lasts 5-10 years if installed correctly, making it a one-time investment with long-term payoffs. Whether you’re dealing with perennial weeds or just tired of pulling dandelions, this method works for vegetable gardens, flower beds, and even pathways. Let’s get started!
📚 In This Guide
- What you need
- Instructions
- Tips and common mistakes
- Wrapping up and next steps
What you need
- ● Weed barrier fabric: 1 roll (typically 4–6 feet wide, 50–100 feet long) – adjust size based on your garden bed dimensions.
- ● Specs: Look for landscape fabric (polypropylene or woven geotextile) rated for UV resistance (3–5 years). Avoid plastic sheets—they don’t allow water drainage!
- ● Staple gun & heavy-duty staples: (or a landscape fabric stapler for easier use).
- ● Utility knife or scissors: For cutting fabric to fit your bed edges.
- ● Measuring tape & chalk or spray paint: To mark layout lines.
- ○ Garden gloves: (Optional but highly recommended—trust us, thorns and dirt are no fun!).
- ● Shovel or spade: For digging trenches or securing edges.
- ○ Mulch (optional but helpful): Wood chips, straw, or gravel (2–3 inches thick) to cover the fabric and deter weeds.
- ● Landscape fabric pins or spikes: For securing fabric in windy areas.
- ● Edging material: (Metal, plastic, or stone) to keep fabric neat and prevent shifting.
- ● Ground cover plants: (Like clover or creeping thyme) for a living, low-maintenance alternative.
- ● Weed killer (pre-install): Spray existing weeds before laying fabric to avoid regrowth.
Step-by-Step guide to installing weed barrier fabric
This method blocks weeds permanently while improving drainage and root health—here's how I do it right.
🪴 Step 1: Prepare Your Garden Bed
Clear the area completely by removing all existing plants, rocks, and debris. Dig down 2-3 inches to create a smooth, level base—uneven spots will cause the fabric to bunch and create gaps where weeds can grow. I like to use a garden rake to break up any remaining clumps in the soil, creating a fine, even surface.
For new beds, mark the layout with stakes and string to ensure straight edges. The fabric needs to extend at least 6 inches beyond your planting area on all sides to prevent weeds from creeping in at the edges. If you're covering an existing path or border, overlap pieces by 6-12 inches to eliminate seams where weeds might invade.
🌱 Step 2: Lay the Weed Barrier Fabric
Unroll the fabric over your prepared bed, smoothing it out completely. Use a garden roller or your boot to press it firmly into the soil, eliminating all wrinkles and air pockets. I find that starting from the center and working outward helps prevent bunching—especially important for larger beds. The fabric should lie flat, with no tension that could cause tearing.
For sloped areas, anchor the fabric with landscape staples or heavy rocks every 12-18 inches to prevent shifting. If you're covering a large area, overlap pieces by 4-6 inches and secure them with staples or landscape tape. This creates a seamless barrier that weeds can't penetrate. Never skip securing edges—this is where most weed invasions begin.
✂️ Step 3: Secure and Cut for Planting
Mark planting locations with stakes or a garden marker before cutting holes in the fabric. Use sharp scissors to create clean, 4-6 inch diameter openings—any larger and weeds will grow through the edges. I like to make the holes slightly larger than needed and then trim them down after planting to ensure a tight fit around stems.
For perennials or shrubs, cut a larger X-shape in the fabric and fold back the flaps to create a pocket for the root ball. This prevents the fabric from wicking moisture away from the plant's roots. After planting, press the soil firmly around the base to eliminate air gaps and secure the fabric edges against the plant stems.
💧 Step 4: Add Mulch and Plants
Spread a 2-3 inch layer of organic mulch over the fabric, leaving the planting holes exposed. I prefer wood chips or straw because they break down slowly while suppressing weeds. Avoid inorganic mulches like gravel—they don't decompose and can create a barrier between the fabric and soil over time.
Plant your desired species directly through the cut holes, being careful not to tear the fabric further. Water thoroughly after planting to settle the soil and help roots establish contact with the fabric. The mulch will help retain moisture while the fabric prevents weed seeds from germinating—you'll notice dramatically fewer weeds within weeks compared to unprotected beds.
☀️ Step 5: Maintain and Monitor
Check the fabric annually for tears or gaps, especially after heavy rains or seasonal expansion/contraction. Repair any damage immediately by overlapping new fabric pieces and securing with landscape staples. I like to do this in early spring before planting season begins—it's easier to see problem areas when the bed is empty.
For long-term installations, consider adding a thin layer of compost over the fabric every 2-3 years to replenish nutrients. The fabric will last 5-10 years**, but the soil beneath it may become nutrient-poor without occasional top-dressing. You'll know it's working when your plants thrive and weeds remain virtually nonexistent—exactly what this method promises.
Tips & tricks for perfect weed barrier fabric installation
Here's what I've learned after years of battling weeds—these tricks make all the difference between a temporary fix and a permanent solution.
Soil Prep Secret: The 2-3 inch dig depth in Step 1 isn't just about smoothness—it's about creating a clean break between the fabric and existing weed roots. I've found that adding a thin layer of coarse sand (about 1/4 inch) before laying the fabric helps prevent soil compaction beneath it, which improves drainage and root penetration for your plants. This small step makes a huge difference in long-term effectiveness.
Edge Security Strategy: When securing edges in Step 2, I double-check overlaps by pinching the fabric where pieces meet—if you can see light through the layers, it's not tight enough. For sloped areas, I use galvanized landscape staples every 12 inches, but for flat ground, I've had great success with heavy landscape fabric edge weights that eliminate the need for staples entirely. This prevents the fabric from shifting during watering or heavy rains.
Planting Hole Precision: The 4-6 inch diameter openings in Step 3 are critical, but here's my pro move: I use a hole punch designed for landscape fabric to create perfectly sized openings. For larger plants, I make the initial cut 1-2 inches larger than needed, then trim after planting to ensure a snug fit. This prevents weeds from sneaking through while allowing ample root space.
Mulch Selection Tip: While Step 4 mentions organic mulch, I've learned that pine straw works particularly well in southern climates because it resists compaction and breaks down slowly. For northern gardens, I prefer shredded hardwood mulch—it holds moisture better in cooler weather. The key is maintaining that 2-3 inch layer consistently; any thinner and weeds start to compete, any thicker and you risk suffocating plant roots.
Pro Tips for Use Weed Barrier Fabric
- Here's what I've learned after years of battling weeds—these tricks make all the difference between a temporary fix a...
- Soil Prep Secret: The 2-3 inch dig depth in Step 1 isn't just about smoothness—it's about creating a clean break betw...
- Edge Security Strategy: When securing edges in Step 2, I double-check overlaps by pinching the fabric where pieces me...
Frequently asked questions
Got questions about making the most of your weed barrier fabric? You’re not alone! Here are some of the most common concerns—and their straightforward solutions—to help you achieve that pristine, weed-free garden with ease.
What’s the best time of year to install weed barrier fabric?
Install your weed barrier fabric in early spring or late fall for optimal results. The soil is workable, and you avoid extreme heat or frost. If weeds are already popping up, clear them first—then lay the fabric before planting. Pro tip: Water the area lightly before installation to help secure the edges!
How long does weed barrier fabric last?
With proper installation, weed barrier fabric can last 5 to 10 years or longer. Durability depends on material quality (polypropylene or woven fabric) and how well it’s protected from UV rays. For extra longevity, cover it with mulch or soil to shield it from sunlight and physical damage.
Can I reuse weed barrier fabric if I remove it later?
Reusing weed barrier fabric is possible but not ideal. Over time, it can degrade, tear, or accumulate debris, reducing effectiveness. If you must reuse it, inspect for holes or wear and clean thoroughly before reinstalling. For best results, treat it as a one-time investment in your landscape.
What’s the difference between weed barrier fabric and landscape fabric?
Weed barrier fabric is heavier-duty (3–5 oz per sq. yd.) and designed to block weeds completely while allowing water and air to pass through. Landscape fabric is lighter (1–3 oz) and often used under mulch—it slows weeds but doesn’t eliminate them. Choose weed barrier for garden beds and landscape fabric for paths or ground cover.
Why are weeds still growing through my weed barrier fabric?
Weeds might sneak through if the fabric has gaps, tears, or wasn’t secured properly. Double-check these steps:
- Overlap seams by 6–12 inches and tape them.
- Bury edges 4–6 inches deep to prevent weeds from crawling underneath.
- Use staples or landscape pins to anchor it tightly.
Wrapping up and next steps
Using weed barrier fabric is your secret weapon for a lush, low-maintenance garden—no more battling weeds or wasting time weeding! 🌱 By following these steps, you’ll create a tidy, weed-free space that lets your plants thrive while keeping your effort minimal.
Now that you’re armed with the know-how, it’s time to roll up your sleeves and transform your outdoor space.
Ready to take the next step? Start small—pick a garden bed, gather your supplies, and get to work! Whether you’re a seasoned gardener or a beginner, this project is totally doable—and the results will make it all worthwhile. Happy gardening! 🌿