
Blooming
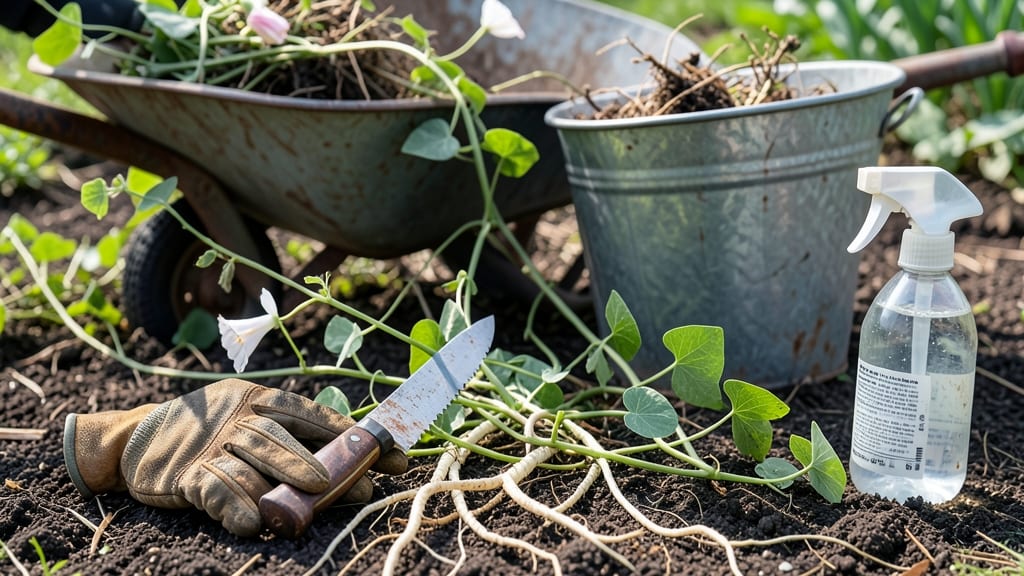
Long-stemmed weeds like dandelions and thistles can turn a neat garden bed into a tangled mess within weeks. I’ve spent years perfecting a 3-step pull method that removes the roots completely—no regrowth, no wasted effort. The secret lies in timing, leverage, and a sharp tool.
You’ll need garden gloves, a stout weeding fork or dandelion digger, and a bucket for debris. Work on a dry day when soil is loose—this makes those stubborn roots easier to extract.
For chemical control, spot-treat with vinegar or a targeted organic herbicide, but always follow label instructions.
By pulling at the base with steady pressure, you’ll see weeds pop out cleanly—roots and all. This method works best for dandelions, chickweed, and creeping charlie, though larger weeds like thistles may require a hose nozzle to loosen the soil first.
The payoff? Crisp, weed-free beds in under an hour.
For prevention, mulch heavily with straw or wood chips to block light, and water deeply to strengthen your plants’ roots. A little effort now saves hours of weeding later—and keeps your garden looking sharp and intentional.
📚 In This Guide
- What you need
- Instructions
- Tips and common mistakes
- Wrapping up and next steps
What you need
- ● Garden Gloves – A pair of durable, breathable gloves (e.g., leather or heavy-duty nitrile) to protect your hands from thorns, dirt, and scrapes. (1 pair)
- ● Weeding Tool or Hori-Hori Knife – A sturdy, long-bladed tool (8–12 inches) for precision digging. (1)
- ● Garden Fork or Trowel – For loosening stubborn roots in compacted soil. (1)
- ● Garden Shears or Pruners – Sharp, bypass-pruning shears for snipping thick stems at the base. (1 pair)
- ● Wheelbarrow or Large Bucket – A 10–15 gallon container to haul weeds and debris. (1)
- ○ Garden Kneeler/Pad – A foldable kneeling pad for comfort during long sessions. (1, optional but recommended)
- ● Hose with Nozzle or Watering Can – To rinse tools and dampen soil before pulling. (1)
- ● Mulch (Straw, Wood Chips, or Grass Clippings) – 2–3 inches to smother regrowth. (Bag or bulk)
- ● Vinegar Spray (20–30% acetic acid) – For spot-treating stubborn weeds (avoid on desired plants!). (Spray bottle)
- ● Boiling Water – A 5-gallon kettle for eco-friendly weed eradication. (1)
- ● Sunscreen & Hat – Because no one enjoys a sunburn mid-weed-pull! (1 each)
Step-by-step guide to eradicating long-stem weeds efficiently
Master this technique and your garden beds will stay weed-free with minimal effort.
Identify and Assess the Weed Population
Begin by scanning your garden beds for long-stemmed weeds like dandelions, thistles, or bindweed. Focus on those with stems exceeding 6 inches—these are the most competitive and will spread rapidly if left unchecked. I like to work in sections, starting with the most visible or problematic areas first. This ensures you don’t miss any hidden growth along pathways or bed edges.
Look for the root structure—tap the base of the stem with your thumb. If the soil resists slightly, the roots run deep. These weeds require the most attention. For shallow-rooted weeds, you can pull them by hand, but deeper-rooted varieties will need a tool. This step is about strategy: knowing which weeds demand more effort saves time later.
Use the Right Tools for the Job
For shallow-rooted weeds, a simple hand weeder or even your fingers will work if you grip the base firmly. For deeper roots, a dandelion digger or weeding fork is essential—these tools let you pry out roots without straining your back. I keep a small bucket nearby to discard weeds immediately, which prevents accidental re-planting.
If the stems are thick and woody, like those of bindweed, you may need long-handled pruners to cut them at ground level. This prevents regrowth from the root crown. The key here is leverage: using the right tool reduces fatigue and ensures you remove the entire root system. Never leave even a small fragment behind—it will regenerate.
Pull with Precision and Dispose Properly
Grip the weed stem as close to the base as possible, then pull upward with a twisting motion. This breaks the root cleanly, especially for weeds like chickweed or lamb’s quarters. For stubborn roots, wiggle the tool gently while pulling to loosen it from the soil. You’ll feel resistance give way—this is your signal the root is free.
Once removed, do not compost weeds with deep taproots or those that spread via runners (like creeping Charlie). These can survive composting and re-emerge in your garden. Instead, bag them for disposal or use them as mulch in non-garden areas, like pathways or lawn edges, where they won’t take root.
Prevent Regrowth with Mulch and Maintenance
After clearing the weeds, apply a 2-3 inch layer of organic mulch (like straw or wood chips) to smother new growth and retain moisture. This step is critical—mulch blocks sunlight, which weeds need to germinate. I recommend reapplying mulch every 4-6 weeks or after heavy rain to maintain coverage.
For long-term control, consider pre-emergent herbicides in high-traffic weed areas, but use them sparingly. Over-reliance can harm beneficial soil organisms. Instead, I focus on consistent monitoring: a quick walk-through of garden beds every 7-10 days catches weeds before they establish. Prevention is always easier than eradication.
Tips & tricks for eradicating long-stemmed weeds effectively
Here's how to turn weed control from a chore into a strategic garden victory—no more missed roots or wasted effort.
The Right Tool for the Root: For weeds with stems exceeding 6 inches, a dandelion digger or weeding fork is your best ally. The key is leverage—these tools let you pry roots out without straining. I’ve found that a simple twist of the wrist while pulling often loosens stubborn roots that resist a straight tug. For thick, woody stems like bindweed, long-handled pruners are a game-changer—they cut cleanly at ground level, preventing regrowth from the root crown.
Precision Pulling Technique: When gripping the weed stem, aim for the base and use a twisting motion to break the root cleanly. This is especially effective for weeds like chickweed or lamb’s quarters. The moment you feel resistance give way, you’ve got the root—no need to yank harder. For deeper roots, wiggle the tool gently while pulling; the soil will release its grip when the root is fully freed. This method minimizes soil disturbance while maximizing root removal.
Mulch Application Strategy: After clearing weeds, apply a 2-3 inch layer of organic mulch like straw or wood chips. The goal is to smother sunlight, which weeds need to germinate. I’ve learned that reapplying mulch every 4-6 weeks—or after heavy rain—keeps new growth at bay. For high-traffic weed areas, a thin layer of newspaper or cardboard under the mulch adds an extra barrier. Just ensure it’s fully covered to avoid smothering your plants.
Monitoring Schedule: Consistent monitoring is the secret to long-term success. A quick walk-through of garden beds every 7-10 days catches weeds before they establish. I’ve found that early intervention—especially for weeds with stems under 6 inches—saves time and effort. Keep an eye out for hidden growth along pathways or bed edges, where weeds often go unnoticed until they’ve spread.
Pro Tips for Long Stem Weeds
- Here's how to turn weed control from a chore into a strategic garden victory—no more missed roots or wasted effort.
- The Right Tool for the Root: For weeds with stems exceeding 6 inches, a dandelion digger or weeding fork is your best...
- Precision Pulling Technique: When gripping the weed stem, aim for the base and use a twisting motion to break the roo...
Frequently asked questions
Got questions about tackling those pesky long stem weeds? You’re not alone—every gardener faces them! Here are some of the most common concerns, answered in a snap to help you reclaim your garden with confidence.
What’s the best time of day to pull long-stem weeds?
Early morning or late afternoon is ideal! The soil is softer after watering, making it easier to grip and remove weeds by their roots. Avoid midday heat—it can make the stems brittle, leaving stubborn bits behind. Pro tip: Pull when the ground is damp to reduce regrowth.
Can I reuse the pulled weeds in my compost?
but with a catch! Small, seed-free weeds (like dandelions) are great for compost. However, avoid weeds with seeds (e.g., thistle or bindweed) or those treated with herbicides—these can contaminate your compost. Toss them in the trash instead.
What if weeds keep growing back after I pull them?
Persistent weeds often mean their roots are still intact or they’ve spread via runners. Dig deeper (2–3 inches) to ensure you’ve got the whole root. For stubborn types like quackgrass, use a hoe to sever underground stems. Mulching afterward blocks sunlight and slows regrowth.
Are there natural alternatives to pulling weeds by hand?
Yes! Try vinegar-based herbicides (1 gallon vinegar + 1 cup salt + 1 tbsp dish soap) for spot treatment, or smother weeds with cardboard or newspaper topped with mulch. For large areas, a flame weeder (rental-friendly!) can zap weeds without chemicals. Just test small areas first!
How often should I pull long-stem weeds to stay ahead?
Consistency is key! Check your garden beds weekly during growing season. Weeds grow fast—some can produce seeds in just 5–7 days. Spend 10–15 minutes per bed to prevent them from becoming unmanageable. Think of it as a quick workout for your garden!
Still stumped? Drop your weed woes below—we’ve got more tricks up our sleeves!
Wrapping up and next steps
Long-stem weeds may seem like a nuisance, but with the right approach, you can turn them into a quick, satisfying win for your garden! 🌱 The key is consistency—grab your tools, follow the three-step pull, and watch your garden beds transform into a lush, weed-free paradise.
Don’t let those pesky stems slow you down; embrace the process and enjoy the peace of mind that comes with a well-maintained space.
Ready to tackle the rest of your garden? Start small—pick a section, apply these techniques, and build momentum. Before you know it, your entire yard will be thriving! 🌿