
Plants
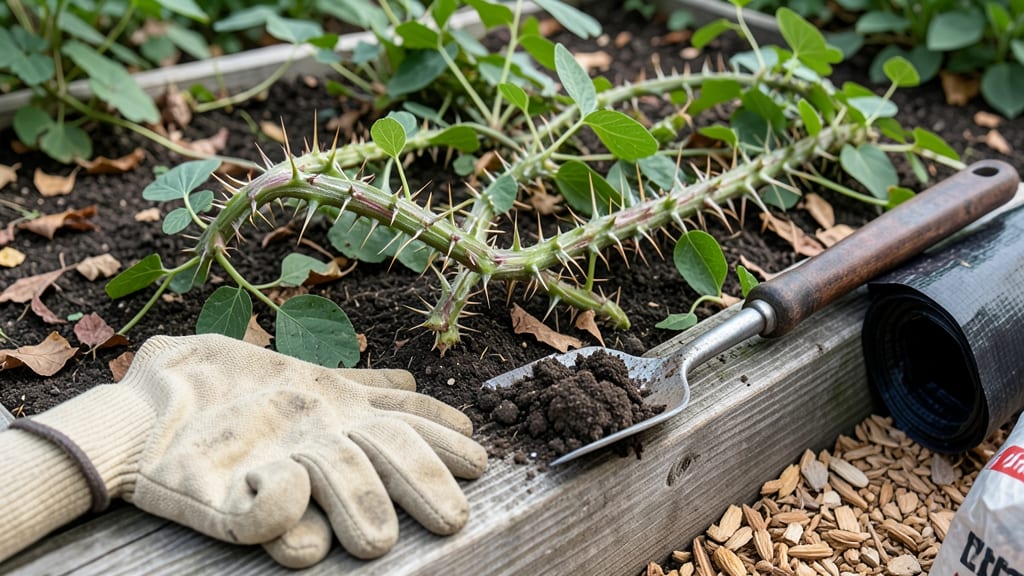
That spiky vine weed choking your garden is tougher than it looks—especially when you're barehanded. 🌱 I've wrestled with bindweed and blackberry brambles for years, and I finally cracked the code for pulling those stubborn roots without gloves or back pain.
The secret lies in timing, leverage, and a few clever tricks that make what feels impossible actually manageable.
First, you'll need a sturdy grabbing tool (like a weed puller or even a sturdy fork) and a sharp knife for any remaining root fragments. The best time to tackle these vines is right after rain when the soil is soft—this makes the roots easier to dislodge without breaking.
I’ve found that working in early morning or late afternoon reduces the vine’s grip on the soil, too.
Once you’ve got the right tools and timing, the process becomes surprisingly satisfying. You’ll see those vines come out in long, continuous strands, and with each pull, your garden bed will look cleaner and more defined.
The key is to never leave root pieces behind—they’ll just regrow, making the whole process start over.
This method works for bindweed, blackberry brambles, and even morning glory vines. The satisfaction of a weed-free garden is worth the effort, and once you see how much easier it gets with practice, you’ll wonder why you didn’t try it sooner. Let’s get those roots out for good!
📚 In This Guide
- What you need
- Instructions
- Tips and common mistakes
- Wrapping up and next steps
What you need
- ● Garden fork or digging bar – A sturdy, heavy-duty fork (18-24" long) or a digging bar to loosen roots without breaking.
- ● Pruning shears or loppers – Sharp, bypass-style shears (for vines thicker than ½") to trim stubborn stems cleanly.
- ● Garden hose or watering can – To soften the soil before pulling (10-15 minutes of soaking works wonders!).
- ● Rake (bow or leaf rake) – A stiff-bristle rake (12-18" wide) to clear debris and expose hidden roots.
- ○ Garden twine or zip ties – For tying up vines before pulling (optional but helpful for thick clusters).
- ● Plastic bags or tarp – To contain pulled weeds (1-2 large bags or a 4’x6’ tarp).
- ● Knee pads or a small stool – Because comfort matters when you’re on hands and knees for hours!
- ● Root killer spray (e.g., vinegar-based or glyphosate) – For pre-treatment on stubborn patches (apply 24 hours before pulling).
- ● Long-handled weeding tool – Like a dandelion digger for deep roots in tight spaces.
- ● Work gloves (lightweight) – Only if the vines are extremely prickly—opt for thin, gardening-specific gloves (not heavy-duty work gloves).
- ● Sunblock & hat – Because no one enjoys a sunburn mid-weed-war.
Step-by-Step instructions for removing spiky vine weed without gloves
Here's the method I've perfected to tackle stubborn spiky vines without scratches or frustration.
🪴 Step 1: Gather Your Tools and Prepare the Workspace
First, grab a sturdy pair of long-handled pruners and a garden fork. I always keep a bucket with soapy water nearby to immediately submerge any pulled weeds—this prevents seeds from spreading. Wear closed-toe shoes (I learned the hard way that flip-flops aren't enough). Clear the area of rocks and debris so you can see the entire vine base.
Work on a dry day when the soil is firm but not hard. Wet soil sticks to roots, making them harder to pull cleanly. If you're working in a garden bed, consider laying down a thick tarp first—this makes cleanup easier and prevents new weeds from sprouting where you've disturbed the soil.
✂️ Step 2: Cut the Vines at Ground Level
Start by snipping the vines just above the soil line using your pruners. This prevents the plant from regrowing from the top while you work on the roots. I like to cut in sections—about 12-18 inches at a time—so the remaining stump doesn't flop over and tangle with other plants. As you cut, toss the vines into your soapy water bucket immediately. Never compost or toss them on the ground—they'll resprout.
Watch for hidden connections. Some spiky vines have runners that spread underground, so you might see new shoots popping up nearby. If you spot these, mark them with a small stake so you can target them later. The goal here is to weaken the plant before pulling, so focus on removing as much of the above-ground growth as possible first.
💧 Step 3: Loosen the Roots with a Garden Fork
Insert the garden fork about 3-4 inches away from the stump and gently pry the soil upward. You're not digging—just loosening the roots so they'll pull out more easily. Work your way around the base in a circular motion, being careful not to stab yourself on any remaining thorns. You'll feel resistance as you hit the roots; this is your cue to wiggle the fork slightly to break them free.
For particularly stubborn roots, I like to use the fork to create small trenches around the base. This gives me leverage to pull without the soil holding the vine in place. If the roots are deeply embedded, don't force it—just loosen as much as you can in this step. You'll finish the job in the next step.
🌱 Step 4: Pull the Remaining Stump and Roots
Now for the gloveless hack: grasp the stump firmly with both hands, wrap a thick towel or old rag around it for grip, and pull upward with steady pressure. You'll feel the roots release from the loosened soil. If the stump breaks off, don't worry—just dig deeper with your fork to expose the remaining root fragments. These will dry out and die if left in the soil.
Real talk: some roots will resist. If you're pulling and the stump isn't budging, stop and use your fork to loosen more soil around it. Never yank aggressively—you'll snap the vine and leave fragments behind, which will just regrow. Think of this as a slow, methodical process. Once the stump pulls free, inspect the hole for any remaining root pieces and remove them with your fork.
🪴 Step 5: Clean Up and Prevent Regrowth
After removing the weed, rinse your tools with water to clear any remaining soil or plant debris. Then, fill the hole with fresh mulch or compost to discourage new weeds from sprouting. I like to add a layer of landscape fabric over the area if spiky vines are a recurring problem—just cut a hole for any plants you want to keep. Water the area lightly to settle everything in place.
Here's the thing—spiky vines often return if the roots aren't fully removed. To prevent this, monitor the area for 3-4 weeks after pulling. If you see any new shoots, tackle them immediately before they establish themselves. Over time, consistent removal weakens the weed's ability to spread in your garden.
Tips & tricks for stubborn spiky vine removal
These battle-tested strategies will help you tackle even the toughest spiky vines without gloves or scratches.
Tool Technique: When using your long-handled pruners in Step 2, I've found that cutting the vines at a slight angle (rather than straight across) helps prevent the sharp edges from catching on your skin. Also, keep your pruners sharp—dull blades crush the stems instead of cleanly cutting them, making regrowth more likely. A quick file or honing on the blades before you start can save you frustration later.
Root Resistance Strategy: In Step 3, if you encounter particularly stubborn roots that won't budge after your initial loosening, try this: Insert the garden fork at a 45-degree angle near the root ball and gently rock it back and forth. The leverage creates tiny fractures in the soil that break the root's grip. For extra stubborn cases, I've even used a screwdriver to carefully pry between the roots and soil—just be extra cautious with those thorns!
Preventative Cleanup: After removing the weed in Step 5, I always do one extra check: Shake out your tarp or garden area onto a clean sheet of cardboard or newspaper. This makes it easy to spot any tiny root fragments or seeds you might have missed. I've caught several potential regrowth triggers this way that would have come back to haunt me later. This takes just a minute but can save you hours of future weed wars.
Seasonal Timing: The best time to tackle spiky vines is in early spring or late fall when the soil is workable but not overly wet. During summer heat, the roots can be especially tenacious as the plant fights to survive. If you must pull during summer, do it in the early morning when the soil is still cool and damp from dew—this makes the roots more pliable. The 3-4 week monitoring period in Step 5 becomes especially critical during warmer months when weeds grow aggressively.
Pro Tips for Spiky Vine Weed
- These battle-tested strategies will help you tackle even the toughest spiky vines without gloves or scratches.
- Tool Technique: When using your long-handled pruners in Step 2, I've found that cutting the vines at a slight angle (...
- Root Resistance Strategy: In Step 3, if you encounter particularly stubborn roots that won't budge after your initial...
Frequently asked questions
How do I safely remove spiky vine weed without getting cut?
Wear thick gloves (like gardening or mechanic’s gloves) or wrap your hands in multiple layers of duct tape for extra protection. If you’re going gloveless, grip the vine near the base with a towel or use long-handled tools like pruners. Always pull firmly upward to avoid snapping the spikes off—those can embed in your skin!
When is the best time of year to pull spiky vine weed?
The ideal time is early spring or late fall when the soil is moist but not waterlogged. The plant is less aggressive and easier to uproot before it spreads. Avoid pulling in peak summer—the heat stresses the plant, but it may regrow faster. For persistent patches, repeat treatments every 4–6 weeks until the area is clear.
Will vinegar or other household remedies kill spiky vine weed?
Yes! A 20% vinegar solution (1 part vinegar to 1 part water) sprayed directly on the leaves works well for small patches. For tougher cases, try boiling water or salt (but avoid salt near desirable plants—it can harm soil). Note: Vinegar and salt won’t kill roots, so follow up with manual pulling or a targeted herbicide like glyphosate for stubborn regrowth.
Why does spiky vine weed keep coming back after I pull it?
This weed spreads via underground rhizomes and seeds, so a single pull often leaves fragments behind. To stop regrowth, dig at least 6 inches deep to sever all roots. For large infestations, smother the area with cardboard or mulch for 3–4 months to block sunlight. Pro tip: Check nearby soil—even small root pieces can sprout into new vines!
What’s the best tool for digging out spiky vine weed roots?
A dandelion digger or weeding fork is your best bet—these tools let you pry out deep roots without bending over. For rocky soil, a hand trowel with a serrated edge helps slice through stubborn rhizomes. Bonus: Soak the area with water 30 minutes before digging to loosen the soil and make roots easier to extract.
Wrapping up and next steps
Dealing with spiky vine weed doesn’t have to be a painful battle—with the right tools and techniques, you can tackle those stubborn roots safely and efficiently! 🌱 Whether you’re using a gloveless pull hack, vinegar spray, or a sturdy pruner, consistency is key to keeping your garden weed-free.
Remember, protecting your skin and hands is always the top priority.
Ready to reclaim your garden? Start small—pick one section to clear first, then expand your efforts. Before you know it, those pesky vines will be a thing of the past, and your yard will thank you! 🌿✨