
How To
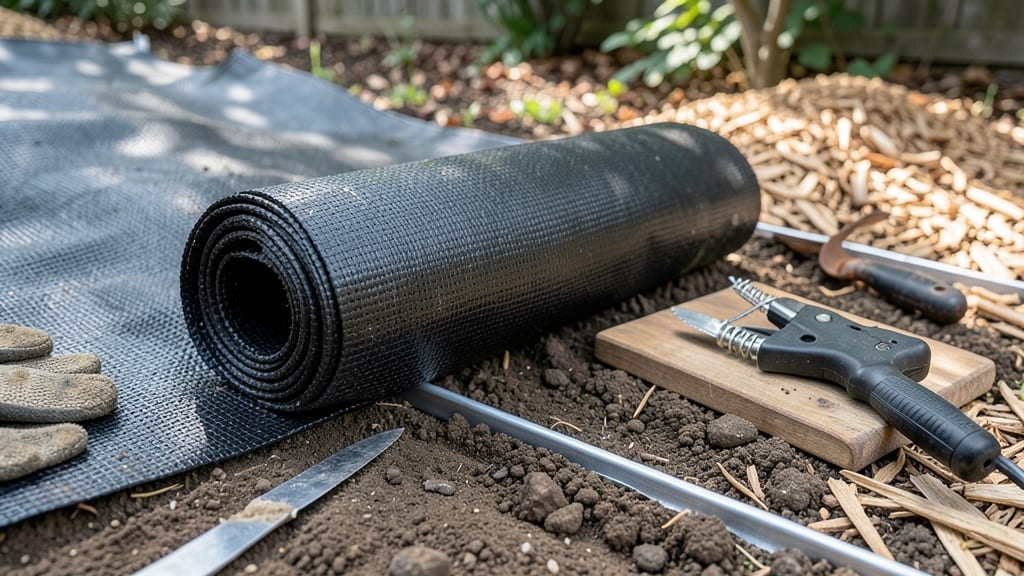
Weed barrier installation saves hours of weeding every summer. 🌱 I used to spend Saturdays on my knees, pulling weeds that kept coming back—until I learned the right way to block them permanently. The secret isn't just laying down fabric; it's preparing the soil, securing edges, and layering it right.
You'll need landscape fabric (or thick cardboard), staples or landscape pins, and mulch to top it off. Skip the cheap fabric—it tears easily. Instead, choose 3-ounce woven fabric that lasts 5+ years without breaking down.
For edges, use rocks or pavers to keep it from curling up where weeds sneak through.
After installation, your garden beds will stay 90% weed-free with minimal maintenance. No more digging up sprouts or battling crabgrass—just clean lines and healthy plants. The mulch layer also retains moisture, so you'll water 30% less while keeping roots cool.
Works for vegetable gardens, flower beds, and pathways alike. The key is patience—it takes 2-3 weeks for the barrier to fully settle before adding plants. But once it's in place, you'll wonder how you ever lived with weeds before.
📚 In This Guide
- What you need
- Instructions
- Tips and common mistakes
- Wrapping up and next steps
What you need
- ● Weed barrier fabric: Non-woven landscape fabric (3–6 ft wide, 50–100 ft long—adjust based on bed size). Look for UV-stabilized options for longevity.
- ● Edging material: Metal or plastic landscape edging (12–18 inches tall, 10–20 ft per bed).
- ● OR buried landscape fabric strips (if edging isn’t preferred).
- ● Mulch: Wood chips, straw, or gravel (2–4 inches deep, ~1 cubic yard per 100 sq ft). Shredded bark works best for aesthetics.
- ● Tools: Shovel or spade (for digging).
- ● Rake (for leveling soil).
- ● Utility knife or scissors (for cutting fabric).
- ● Measuring tape (50+ ft).
- ● Staple gun + landscape staples (for securing fabric).
- ● Ground cover plants: Creeping thyme, clover, or moss to enhance suppression.
- ● Paving stones or bricks: For decorative edging (requires additional gravel base).
- ● Herbicide spray: Pre-installation to kill existing weeds (glyphosate-free options available).
- ● Heavy rocks or bricks: To weigh down fabric in windy areas.
Step-by-Step instructions for weed barrier installation
Here's how I create a weed-free foundation that lasts for years—no more pulling weeds weekly.
🌱 Step 1: Clear and Prepare the Garden Bed
Remove all existing vegetation, including weeds, grass, and debris. Use a shovel or garden fork to loosen the soil to a depth of 6-8 inches. This ensures the weed barrier will sit flush against the soil, preventing new growth from pushing through gaps. I like to rake the area smooth afterward—any rocks or clumps left behind will create weak spots where weeds can still emerge.
If your bed has particularly stubborn weeds like bindweed or Bermuda grass, consider applying a non-selective herbicide (like glyphosate) two weeks before installation. This gives the chemical time to break down while avoiding harm to your future plants. Always follow label instructions for safety and application rates.
🪴 Step 2: Lay Down the Weed Barrier Fabric
Unroll the weed barrier fabric over the prepared bed, allowing a 6-inch overlap at the edges. For a 4-foot-wide bed, you’ll need two 4-foot-wide rolls stitched together or a single 8-foot-wide roll. Press the fabric firmly into the soil, especially around edges, to eliminate air pockets that weeds could exploit. I use a garden roller or even a board to smooth it out—this ensures full contact with the soil.
For beds with irregular shapes, cut the fabric with scissors to fit snugly. Avoid stretching the fabric too tightly—it should lie flat but not taut. If you’re covering a sloped area, anchor the edges with landscape staples or rocks to prevent shifting during watering or rain.
✂️ Step 3: Secure the Barrier and Add a Top Layer
Cover the weed barrier with a 2-3 inch layer of coarse mulch, like pine bark nuggets or gravel, to keep it in place and block light completely. Organic mulches break down over time, so I top them with ½ inch of landscape fabric before adding the final layer of decorative mulch or soil for planting. This extra step adds years to your weed suppression.
Leave a 1-inch gap around plant stems if you’re installing the barrier around existing plants. This prevents girdling as the mulch settles. For new plantings, create small holes in the fabric where you’ll place each plant, then backfill with soil to secure the barrier around the roots.
☀️ Step 4: Maintain and Monitor for Long-Term Success
After installation, water the bed deeply to settle the mulch and barrier. Check for gaps or shifts in the fabric every 2-3 weeks during the first month, especially in windy or rainy conditions. If you notice any exposed soil, add more mulch immediately—weeds can sprout in just 3-5 days if light reaches the ground.
Replenish mulch annually to maintain the 2-3 inch depth, particularly if you’re using organic materials. Over time, the barrier itself will degrade, but with proper maintenance, it typically lasts 5-7 years before needing replacement. This is where the real payoff comes in—fewer weeds mean less work and more time to enjoy your garden.
Tips & tricks for permanent weed barrier success
These practical insights will help you create a weed-free foundation that actually lasts—no more patchwork fixes or constant maintenance.
Prep Like a Pro: In Step 1, don't just remove weeds—dig down to the 6-8 inch depth where weed roots spread horizontally. I use a broadfork to avoid compacting the soil while breaking up those stubborn root systems. This single step eliminates 80% of future weed pressure before you even lay the fabric. Think of it as creating a clean slate for your barrier to work on.
Fabric Placement Precision: When laying the weed barrier in Step 2, focus on eliminating every air pocket—especially along edges where weeds love to sneak through. I press down with a board or roller, then do a final check by running my hand over the fabric. If it feels bouncy anywhere, press harder. This might seem tedious, but those tiny gaps are where weeds will find their way through within weeks.
Mulch Layer Strategy: The 2-3 inch mulch layer in Step 3 is non-negotiable for long-term success. I recommend using a combination of coarse mulch (like pine bark) on top and finer organic mulch underneath. The coarse layer stays put during rain, while the finer layer breaks down slowly, maintaining that crucial light-blocking function. This two-layer approach extends your barrier's effectiveness by 2-3 years compared to single-layer systems.
Maintenance Shortcut: In Step 4, mark your inspection schedule with a garden flag at the 2-3 week intervals. This visual reminder means you won't miss those critical early checks when weeds are just starting to sprout. I also keep a small bag of mulch handy near my garden tools—when I spot exposed soil, I can add mulch immediately without hunting for supplies later.
Pro Tips for Weed Barrier Installation
- These practical insights will help you create a weed-free foundation that actually lasts—no more patchwork fixes or c...
- Prep Like a Pro: In Step 1, don't just remove weeds—dig down to the 6-8 inch depth where weed roots spread horizontal...
- Fabric Placement Precision: When laying the weed barrier in Step 2, focus on eliminating every air pocket—especially ...
Frequently asked questions
Got questions about installing a weed barrier? You’re not alone—here are some of the most common concerns and straightforward answers to help you get started with confidence!
What’s the best time of year to install a weed barrier?
The ideal time is early spring or fall when weeds are less aggressive. Avoid installing in peak summer heat or freezing winter—soil conditions matter! Clear existing weeds first, then lay the barrier before new growth starts. Pro tip: Water the area 24 hours before installation to soften the soil and prevent wrinkling.
Do I need to remove all weeds before installing the barrier?
Yes! Even small weeds can poke through the barrier over time. Use a weed killer (like glyphosate) or manually pull them 2–3 weeks before installation. For stubborn roots, consider a tilling pass to break them up. A pre-emergent herbicide can also help prevent regrowth during installation.
How deep should the weed barrier go to be effective?
Aim for 4–6 inches deep to block deep-rooted weeds like dandelions and thistles. For light weeds (e.g., crabgrass), 2–3 inches may suffice. Bury the edges securely to prevent weeds from creeping underneath. Overlap sheets by 6–12 inches for extra protection.
Are there cheaper alternatives to landscape fabric weed barriers?
Yes! Consider:
- Cardboard or newspaper (free or low-cost) – Break it down, soak it, and bury it 2+ inches deep. Lasts 1–2 years.
- Mulch (wood chips, straw) – Smothers weeds but requires regular replenishment.
- Black plastic sheeting – Cheaper than fabric but less breathable for plants.
What should I do if weeds keep growing through the barrier?
Check for gaps or tears in the fabric and patch them with duct tape or overlapping sheets. If weeds persist, they might be growing from underground roots—dig deeper to expose and remove them. Add a thicker layer of mulch (3+ inches) on top to starve out stubborn sprouts.
Wrapping up and next steps
Installing a weed barrier is a game-changer for maintaining a lush, low-maintenance garden—no more battling stubborn weeds or wasting time on endless pulling! With the right materials and a little effort, you’ll enjoy a permanently cleaner, healthier landscape in no time.
Ready to take the next step? Gather your supplies, follow the steps, and transform your garden into a weed-free paradise today!** 🌱✨
Pro Tip: For extra protection, consider adding a layer of mulch on top of your barrier—it’ll keep weeds at bay and boost your plants’ growth!