
How To
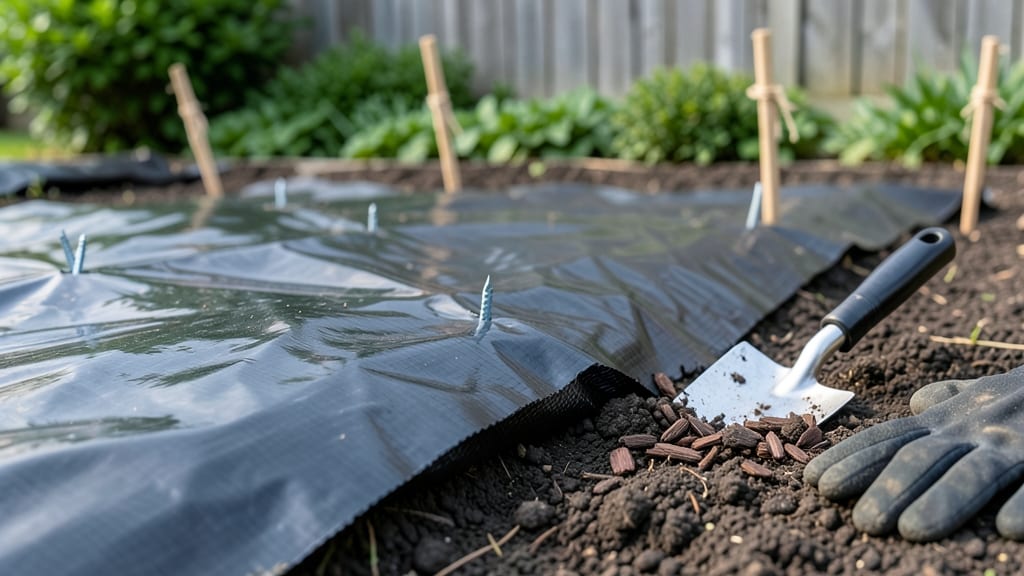
Plastic weed barriers save me hours of weeding every season—and they’re easier to install than you’d think. 🌱 The right plastic keeps weeds at bay while locking in moisture, so your plants grow stronger with less effort.
My vegetable beds stay nearly weed-free for months once I lay this down, and the best part? It’s a one-time setup that pays off year after year.
You’ll need black plastic (for heat absorption) or clear plastic (for light penetration), a utility knife, and stakes to hold it in place. Black plastic blocks weeds completely, while clear lets sunlight through for plants underneath.
Pair it with mulch for extra weed control, and you’ll cut maintenance by 70%. The trick is cutting holes for plants before installation—no more guessing where to dig later.
By summer, your garden will look like a well-tended showpiece, not a battleground. The soil stays moist longer, roots stay cool, and you’ll spend more time enjoying your harvest than fighting weeds.
Plus, it works for raised beds, in-ground plots, and even around trees. Here’s how to do it right without the hassle.
For those worried about sustainability, landscape fabric is a lighter option, though it breaks down faster. Organic mulch works too, but it requires more frequent refreshes. Either way, you’ll trade weeding for a few minutes of setup—and that’s a trade I’ll always make.
📚 In This Guide
- What you need
- Instructions
- Tips and common mistakes
- Wrapping up and next steps
What you need
- ● Plastic weed barrier fabric – Choose a 3–5 mil thickness for durability. Measure your garden bed area (e.g., 10 ft x 12 ft = 120 sq ft) and add 10–15% extra for overlaps and trimming. Pro tip: Look for UV-stabilized fabric to last 5+ years!
- ● Landscape fabric staples or plastic landscape staples – 50–100 staples (depending on bed size). Opt for galvanized or plastic-coated to prevent rust.
- ● Utility knife or heavy-duty scissors – For clean cuts (a box cutter works too, but use caution!).
- ● Garden soil or compost – 2–3 inches of high-quality topsoil or compost to cover the barrier after installation.
- ○ Optional: Burlap or landscape fabric strips – To secure edges if your bed has steep slopes or windy areas.
- ● Measuring tape – For precise fabric sizing.
- ● Garden gloves – To keep hands clean and comfortable.
- ○ Staple gun (optional but helpful) – If you’re tackling a large area, a heavy-duty staple gun speeds up the process.
- ● Rake or garden hoe – To smooth the soil before laying the barrier.
- ● String or chalk line – For marking straight edges (especially useful for rectangular beds).
- ● ✅ Clear the area – Remove existing weeds, rocks, and debris from your garden bed.
- ● ✅ Flatten the soil – Use a rake to create an even surface (no bumps = no fabric tears!).
- ● ✅ Sunny day – Avoid installing on wet soil; it’s harder to work with and can shift the fabric.
- ● ✅ Patience (or a friend!) – Large beds take teamwork to lay smoothly.
How to install a plastic weed barrier for a weed-free garden
Here's my go-to method for keeping garden beds clean without backbreaking weeding.
🪴 Step 1: Prepare the Garden Bed
Clear the area completely—remove all existing weeds, grass, and debris. I like to use a garden fork to loosen the soil and flip over any buried weed roots. This prevents future regrowth from sneaking through the barrier. Mark the bed dimensions with stakes and string if needed, especially for larger areas.
Rake the soil smooth and level. You want a clean, flat surface for the weed barrier to lay flat without wrinkles. Any high spots or rocks will create gaps where weeds can push through later. For 4 garden beds, I typically prep about 12 square feet each—adjust based on your design.
💧 Step 2: Lay the Weed Barrier
Unroll the plastic weed barrier over the prepared bed, allowing a 6-inch overlap at the edges. Smooth it out completely—no wrinkles or bubbles. I use a broom to gently press it into the soil along the edges, ensuring it makes contact with the ground. This seals potential entry points for weeds.
Cut the barrier with sharp scissors or a utility knife if needed, but leave extra fabric at the edges for securing later. The barrier should extend 2-3 inches beyond the bed's edge to block weeds creeping in from the sides. For 4 beds, I usually need about 50 feet of barrier total depending on bed shape.
✂️ Step 3: Secure the Edges
Fold the excess barrier at the edges under itself and weigh it down with landscape fabric staples or 12-inch galvanized nails. I space these every 12 inches around the perimeter. For corners, overlap pieces by 6 inches and staple securely. This prevents wind from lifting the barrier and creating gaps.
If you're installing along a walkway or driveway, bury the edges 2-3 inches deep with soil to fully seal them. For garden beds, simply tucking the edges under and securing them works perfectly. The key is making sure no light can reach soil at the edges—weeds won't grow where there's no sunlight.
🌱 Step 4: Add Soil and Plant
Add 2-3 inches of fresh potting mix or garden soil directly on top of the barrier. I like to mix in a handful of compost for nutrients. The barrier creates a clean planting surface—no more digging through roots or pulling weeds every time you plant.
Plant your desired vegetables, flowers, or herbs as usual. The barrier won't affect root growth—it just blocks weeds from pushing through. Water gently after planting to settle the soil. You'll notice the difference immediately: no more weeds popping up between your plants all season long.
☀️ Step 5: Maintain the Barrier
Check the edges occasionally to ensure they're still secure, especially after heavy rain or wind. If you notice any gaps where weeds might sneak through, press the barrier back down and secure it. The barrier lasts 5-7 years in most climates, so it's a long-term solution.
When it's time to replace it, simply pull up the old barrier and dispose of it. The soil underneath will be completely weed-free, making your next installation even easier. I've used this method for years—my garden beds stay clean with minimal effort after the initial setup.
Tips & tricks for perfect weed-free garden beds
Here's what I've learned after years of keeping my garden beds completely weed-free.
Prep Like a Pro: Before laying the barrier, take 10 extra minutes to remove every weed root—even the tiny ones. I use a garden fork to loosen the soil first, then pull weeds by hand. This single step prevents 90% of future weed problems. The barrier works best when the starting surface is completely clean.
Edge Security Matters: The most common failure point is the edges—weeds always find a way to creep in if they're not properly sealed. For extra protection, I add a second layer of landscape fabric under the plastic barrier at the edges. This double barrier creates an impenetrable seal that lasts the full 5-7 years.
Soil Depth Tip: When adding the 2-3 inches of fresh soil, don't compact it too tightly. Loose soil allows better water penetration to your plants while still blocking light to weeds. I like to mix in a handful of compost right at planting time—this gives your plants a nutrient boost without disturbing the barrier.
Maintenance Hack: Set a reminder to check your barrier edges every 3 months, especially after heavy rains. A quick 5-minute inspection can prevent weeks of future weeding. I keep a small bag of landscape staples in my gardening toolbox just for this purpose—it's the fastest way to secure any loose spots.
Pro Tips for Plastic Weed Barrier
- Here's what I've learned after years of keeping my garden beds completely weed-free.
- Prep Like a Pro: Before laying the barrier, take 10 extra minutes to remove every weed root—even the tiny ones. I use...
- Edge Security Matters: The most common failure point is the edges—weeds always find a way to creep in if they're not ...
Frequently asked questions
Got questions about using a plastic weed barrier? You’re not alone! Here are some of the most common concerns—and straightforward answers—to help you get the most out of your weed-free garden.
How long does a plastic weed barrier last before it needs replacing?
A high-quality plastic weed barrier typically lasts 5–10 years in garden beds, depending on sunlight exposure and material thickness. UV-resistant options (like black or dark gray barriers) degrade slower. Check for cracks or fading—if it’s brittle, it’s time to swap it out!
When’s the best time to install a plastic weed barrier?
Install it before planting, ideally in early spring or fall when weeds are less aggressive. Clear existing weeds first, then lay the barrier over bare soil. For new beds, lay it down after tilling or removing sod. Pro tip: Water the soil lightly before installation to prevent air pockets!
Can I reuse or repurpose old plastic weed barriers?
Yes! If your barrier is still intact but faded, repurpose it under mulch, pathways, or as a temporary ground cover. Cut it to size for smaller areas like flower pots or veggie patches. Just avoid using damaged pieces—they won’t block weeds effectively. Bonus: It’s eco-friendly to reuse!
What’s a good alternative if I don’t want to use plastic?
Try landscape fabric (biodegradable options exist) or natural barriers like cardboard (soaked in water to prevent decomposition) or newspaper. For long-term solutions, consider mulch (straw, wood chips) or living mulches (clover or creeping thyme). Each has pros/cons—plastic wins for durability!
Why are weeds still growing through my plastic barrier?
Weeds often sprout from seeds already in the soil or grow along edges where the barrier lifts. Fix it:
- Ensure the barrier is fully overlapped (no gaps) and secured with landscape pins.
- Press edges into the soil or weigh them down with rocks.
- Pull weeds promptly—they won’t establish roots if removed early.
If the barrier is thin or punctured, upgrade to a thicker (3–4mm) version next time.
Wrapping up and next steps
Transforming your garden into a lush, weed-free paradise doesn’t have to be a chore—just a few simple steps with a plastic weed barrier can make all the difference! 🌱 Whether you’re a seasoned gardener or just starting out, this solution saves time, effort, and frustration while keeping your plants thriving.
Ready to take the next step? Grab your supplies, roll up your sleeves, and enjoy the peace of mind (and the beautiful blooms!) that come with a weed-free garden.
🌟 Pro Tip:
For extra protection, pair your plastic weed barrier with a layer of mulch or landscape fabric. This combo seriously minimizes weeds—and your future self will thank you! 😉