
Pests and Diseases
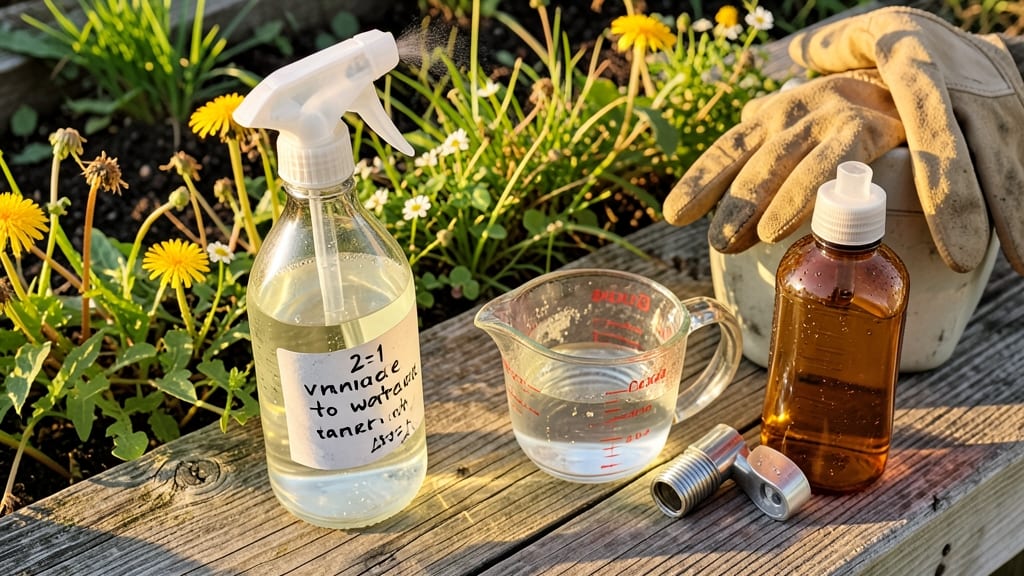
A fast-acting vinegar weed killer can clear stubborn weeds in hours—no harsh chemicals needed. I’ve used this recipe to transform patchy lawns and cracked driveways, and it works when store-bought sprays fail.
The key is precision: vinegar kills indiscriminately, so you’ll need to shield nearby plants and apply it on a dry, sunny day for best results.
You’ll need just three ingredients: white vinegar (5% acetic acid), dish soap (as a surfactant), and a spray bottle. Mix 1 gallon of vinegar with 1 tablespoon of soap—that’s it.
For tough weeds like dandelions or clover, reapply after 24 hours. The solution works fastest on young weeds, so tackle them early in the season.
Expect results within 24-48 hours—weeds turn brown and crispy as the vinegar breaks down their cell walls. The process is organic, budget-friendly, and safe for pets once fully dried. Just avoid windy days (it drifts) and never spray desirable plants or edible gardens.
For extra stubborn weeds, add 1 cup of salt to the mix, but use sparingly—salt can harm soil over time. Test on a small area first, and always wear gloves.
This method isn’t perfect (it won’t kill deep-rooted weeds like nutgrass), but for most weeds, it’s a game-changer for chemical-free lawn care.
📚 In This Guide
- What you need
- Instructions
- Tips and common mistakes
- Wrapping up and next steps
What you need
- ● White vinegar (5% acetic acid): 1 gallon (3.8 liters) – Look for plain, undiluted vinegar (avoid flavored or colored varieties).
- ● Dish soap (blue Dawn recommended): 1 tablespoon – Helps the solution stick to weeds.
- ● Water: 1 gallon (3.8 liters) – Use warm water for better mixing.
- ● Spray bottle or garden sprayer: 1–2 (1–2 gallon capacity) – Choose a pump or hose-end sprayer for larger areas.
- ● Protective gear: Gloves (nitrile or rubber)
- ● Eye protection (safety goggles)
- ● Long sleeves/pants (to avoid vinegar burns)
- ● Measuring cup or scale: For precise vinegar-to-water ratios if scaling up.
- ● Garden hose with nozzle: For rinsing off sprayers or diluting larger batches.
- ● Newspaper or cardboard: To protect plants or surfaces near your target weeds.
- ● Spray shield or cardboard: To avoid drift onto desired plants.
- ● Choose a sunny, dry day (vinegar works best in direct sunlight).
- ● Test the spray on a small, hidden weed patch first to check effectiveness.
- ● Avoid using near vegetable gardens, flowers, or grass—vinegar kills everything it touches!
Step-by-Step instructions for vinegar weed killer application
Here’s how to create and apply a targeted, effective vinegar-based weed killer that works within hours.
Prepare the Vinegar Solution
Use white vinegar (5% acetic acid) for best results—higher concentrations can harm surrounding plants. Mix 1 gallon of white vinegar with 1 cup of salt and 1 tablespoon of liquid dish soap. The salt enhances the vinegar’s effectiveness, while the dish soap helps break surface tension so the solution adheres to weed foliage. Stir thoroughly until the salt dissolves completely.
Transfer the solution to a spray bottle with a fine mist nozzle—this ensures precise application without overspray. Avoid using metal containers, as vinegar can corrode them over time. Label the bottle clearly to distinguish it from other garden solutions.
Choose the Right Conditions for Application
Apply the weed killer on a sunny, dry day when temperatures are between 70-85°F. Weeds absorb the vinegar best when their leaves are fully extended and dry. Avoid applying before rain or when dew is present—this dilutes the solution and reduces effectiveness. Early morning applications work best, as the sun helps dry the foliage quickly, accelerating the vinegar’s action.
Target weeds when they’re actively growing, typically in spring or early fall. Broadleaf weeds like dandelions and clover respond fastest, while grassy weeds may require multiple treatments. Avoid spraying desirable plants, as vinegar will kill any green tissue it contacts.
Apply Directly to Weeds
Hold the spray bottle 6-8 inches above the weed and apply until the foliage is completely saturated but not dripping. Focus on the leaves—vinegar works by dehydrating the plant, so coverage is critical. For stubborn weeds, reapply every 2-3 days until the weed turns brown and wilts. Most weeds die within 24-48 hours of proper application.
Use a cardboard barrier around the base of plants you want to protect, as vinegar can drift. For large areas, consider a pump sprayer filled with the solution for more even coverage. Always wear gloves and eye protection, as vinegar can irritate skin and eyes.
Monitor and Retreat as Needed
Weeds typically turn brown and crisp within 24 hours of treatment. If any green remains after 48 hours, reapply the solution. Some deep-rooted weeds may require 2-3 treatments spaced 3-5 days apart to fully eliminate the plant. Avoid tilling or disturbing the soil after treatment, as weed roots may regrow from fragments.
For persistent weeds, consider adding 1 tablespoon of citric acid to the original mixture—this boosts the acidity slightly and improves results on tough species like nutsedge. After clearing weeds, replenish the soil with compost or mulch to prevent regrowth.
Tips & tricks for effective vinegar weed killer application
Mastering this natural weed control method means paying attention to detail—especially when it comes to solution strength, timing, and environmental conditions. Here’s how to maximize effectiveness while protecting your garden.
Solution Strength: The 5% acetic acid concentration in white vinegar is ideal because it targets weeds without harming most desirable plants. If you encounter tough weeds like nutsedge, the optional addition of 1 tablespoon of citric acid to the original mixture increases acidity slightly, enhancing effectiveness without compromising safety. However, never exceed this amount—higher concentrations risk damaging surrounding vegetation.
Application Precision: In Step 3, when you’re applying the solution, focus on the leaves rather than the soil. Vinegar works by dehydrating plant cells, so complete saturation of the foliage is critical. For stubborn weeds, reapplication every 2-3 days ensures full coverage, especially if rain or dew dilutes the initial application. Use a cardboard barrier around plants you want to protect—vinegar can drift even with careful spraying.
Timing and Temperature: The 70-85°F temperature range specified in Step 2 is non-negotiable for optimal results. Weeds absorb vinegar most efficiently when leaves are dry and fully extended, which occurs naturally on sunny mornings. Avoid applying before rain or when dew is present—this dilutes the solution and reduces its dehydrating effect. Early morning applications also allow the sun to accelerate the drying process, speeding up the 24-48 hour kill time.
Monitoring and Retreat Strategy: After the initial 24-hour period, check for any remaining green foliage. If present, reapply immediately—vinegar doesn’t penetrate roots on the first pass. For deep-rooted weeds requiring 2-3 treatments, space applications 3-5 days apart to avoid overwhelming the plant. Once weeds are fully brown and crisp, avoid tilling the area—disturbing roots can cause regrowth from fragments.
Pro Tips for Vinegar Weed Killer Recipe
- Mastering this natural weed control method means paying attention to detail—especially when it comes to solution stre...
- Solution Strength: The 5% acetic acid concentration in white vinegar is ideal because it targets weeds without harmin...
- Application Precision: In Step 3, when you’re applying the solution, focus on the leaves rather than the soil. Vinega...
Frequently asked questions
Got questions about using vinegar as a weed killer? You’re not alone! Here are some of the most common concerns—and answers—to help you tackle weeds like a pro.
How long does it take for vinegar to kill weeds?
Most weeds start wilting within hours after application, but full death can take 3–7 days, depending on the weed type, vinegar strength, and weather. Hot, sunny days speed up the process, while rain may dilute the solution. For best results, reapply if weeds are still green after a week.
Will vinegar kill my grass or plants?
Yes! Vinegar is a non-selective herbicide, meaning it kills all plants it touches. To protect grass or desirable plants, spot-treat weeds only and avoid overspray. For lawns, use a barrier (like a cardboard shield) around grass edges. Always do a small test patch first.
Can I use white vinegar or do I need apple cider vinegar?
Both work, but higher-acid vinegar (like apple cider or industrial-strength vinegar) is more effective. White vinegar (5% acidity) may require multiple applications for tough weeds. For stubborn weeds, opt for 20–30% vinegar (diluted properly) or mix with salt/dish soap for extra potency.
What’s the best time of day to apply vinegar weed killer?
Apply on a clear, sunny day between 10 AM and 4 PM to maximize vinegar’s effectiveness. Avoid windy days (to prevent drift) and watering the area for 24 hours before or after application. Morning dew or evening moisture can dilute the solution and reduce results.
What if the weeds keep coming back?
Persistent weeds often mean the vinegar wasn’t strong enough or the roots weren’t fully targeted. Try these fixes:
- Boost the recipe: Increase vinegar concentration to 20–30% (mix 1 part vinegar + 1 part water).
- Add salt or dish soap (1 tbsp each per gallon) to enhance absorption.
- Reapply every 3–5 days until weeds are gone.
- Dig out stubborn roots after wilting to prevent regrowth.
Are there any weeds vinegar won’t kill?
Vinegar struggles with deep-rooted perennials (like dandelions or creeping Charlie) and woody plants (e.g., nutgrass or bindweed). For these, combine vinegar with boiling water or a vinegar-salt-soap mix. Repeat treatments may be needed, or consider manual removal for tough cases.
Wrapping up and next steps
Ready to reclaim your lawn without harsh chemicals? This vinegar weed killer recipe is your eco-friendly ally—simple, cost-effective, and powerful enough to tackle stubborn weeds in no time. 🌱 Whether you're dealing with dandelions, clover, or crabgrass, you now have a natural solution at your fingertips.
Take the next step by testing a small patch of your lawn first to ensure the recipe works for your specific weed types. Then, roll up your sleeves and enjoy the satisfaction of a chemical-free, thriving outdoor space! 🌿